Installer for Linux
The Scriptcase installer installs Apache, PHP and Scriptcase on your operating system. The installer does not include a database.
Prerequisites
To download the Scriptcase Installer, go to our download page clicking here.
Listed below are the operating systems approved for Scriptcase use. Check the list of supported distros:
The Scriptcase installer is compatible with any distribution with its GLIBC 2.17 or higher
| Distro | GLIBC | |
|---|---|---|
| RedHat 7 | 2.17 | |
| RedHat 8 | 2.28 | AlmaLinux, Rocky Linux, CentOS Stream |
| RedHat 9 | 2.28 | AlmaLinux, Rocky Linux, CentOS Stream |
| Debian 8 | 2.19 | MX, Q4OS, SparkyLinux, Zorin, Devuan, Deepin, Kali |
| Debian 9 | 2.24 | MX, Q4OS, SparkyLinux, Zorin, Devuan, Deepin, Kali |
| Debian 10 | 2.28 | MX, Q4OS, SparkyLinux, Zorin, Devuan, Deepin, Kali |
| Debian 11 | 2.31 | MX, Q4OS, SparkyLinux, Zorin, Devuan, Deepin, Kali |
| Debian 12 | 2.36 | MX, Q4OS, SparkyLinux, Zorin, Devuan, Deepin, Kali |
| Debian 13 | 2.37 | MX, Q4OS, SparkyLinux, Zorin, Devuan, Deepin, Kali |
| Ubuntu 18.04 | 2.27 | Elementary, Mint, Pop!_OS, Linux Lite, KDE neon |
| Ubuntu 20.04 | 2.31 | Elementary, Mint, Pop!_OS, Linux Lite, KDE neon |
| Ubuntu 22.04 | 2.35 | Elementary, Mint, Pop!_OS, Linux Lite, KDE neon |
| Ubuntu 23.04 | 2.37 | Elementary, Mint, Pop!_OS, Linux Lite, KDE neon |
| SuSe 15 | 2.31 | |
| openSuSe leap ( 15 ) | 2.31 | |
| openSuSe tumbleweed | 2.38 | |
| Fedora 37 | 2.36 | |
| Fedora 38 | 2.37 | |
| Fedora 39 | 2.38 | |
| AWS 1 | 2.17 | Amazon Linux |
| AWS 2 | 2.26 | Amazon Linux |
| AWS 3 | 2.34 | Amazon Linux |
| ArchLinux base-20230910.0.177821 | 2.38 | EndeavourOS, Manjaro, Garuda, ArcoLinux |
NOTE: Before proceeding with the installation, it is recommended not to have any other web environments installed (such as LAMP, Zend Server, etc) on your operating system. It is recommended to have some basic knowledge of Linux/Unix environment to use the Terminal (Shell).
This documentation will describe Scriptcase installation in 3 simple steps:
1 - Run Scriptcase Installer.
2 - Choose installer settings.
3 - Run Scriptcase.
Running Scriptcase Installer
1 - Browse to the directory where the installer is located.
Before we can run the Scriptcase installer, we need to access the folder where the installer file is located using the cd command.
Example: sudo cd /home/your_user/Downloads
NOTE: Scriptcase installer requires administrative permissions to make changes to your machine. We will have to use the
sudocommand to run the installer.
2 - Grant permission to the installer file and run it.
For you to run the chmod command that changes the permissions of a file or directory, you must also run the sudo command.
Example: sudo chmod +x scriptcase_linux_installer_en_us_v9.9.021-php81.run
The chmod + x command is used to make the installer .run file executable.
3 - Run the Installer file.
Example: sudo ./scriptcase_linux_installer_en_us_v9.9.021-php81.run
Choosing the Installer settings
NOTE: Installing Scriptcase with PHP 8.1 will not conflict with an existing Scriptcase installation with PHP 7.0 or 7.3. The Installer configures an Apache service (apachesc9php81) with a different port (8092) than the installer with PHP 7.0. or 7.3
Will be automatically installed on the operating system:
- Apache Web Server v2.4.53.
- PHP 8.1 with extensions MBSTRING, ZIP, BCMATH and GD enabled.
- SourceGuardian: 13.0.3.
- Scriptcase.
1 - Choose the installation language.
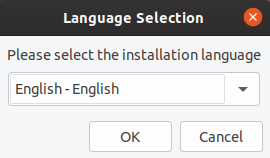
Language
You can select the language that will be displayed in the installation process. This step does not select the Scriptcase interface language, only the installer language.
Click Ok to continue
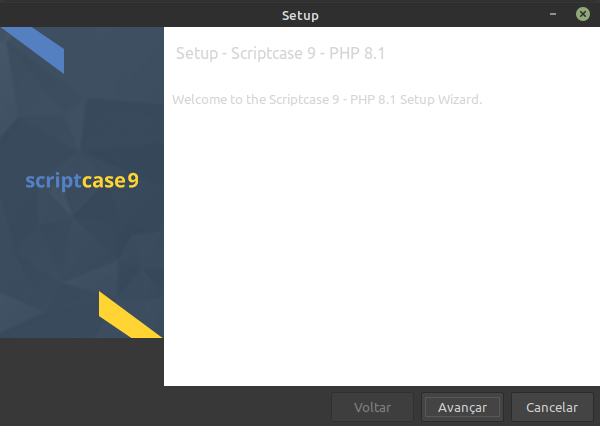
2 - Click “Next” to continue.
3 - Read and accept the terms of the license agreement.
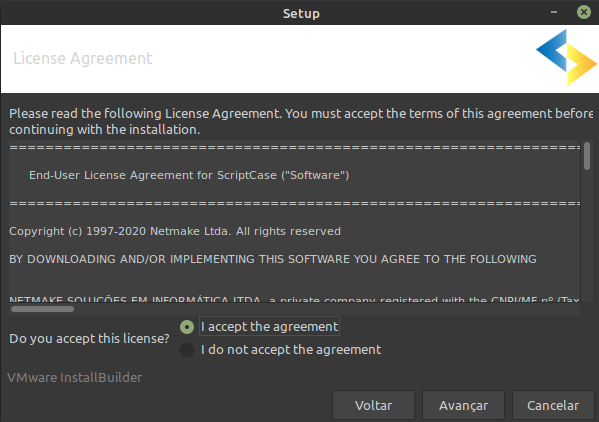
Click Next to continue.
4 - Select drivers to install.
The installer will ask if you want to add some additional drivers to the installation process: Oracle instant Client, DB2 dsdriver and Informix CSDK Driver.
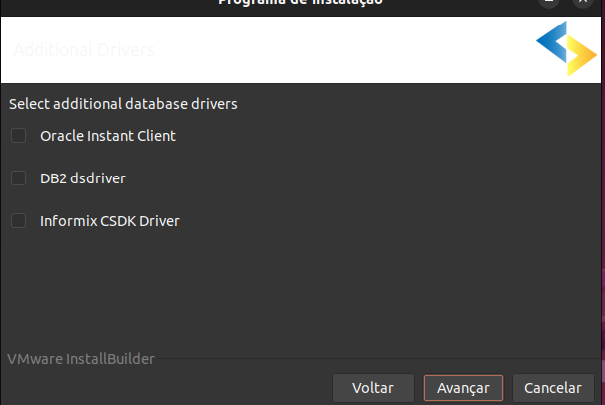
When you click next, the installer will download the chosen drivers
If you choose not to include any of these drivers at installation time, you can add them manually. The path where you must add the drives follows the following folder structure: /opt/Scriptcase/v9-php81/components/drivers/driver_folder
The following table shows the additional drivers, their respective directories and links to downloads
| Driver | Path | Driver - link x64 |
|---|---|---|
| OCI8/PDO_OCI | /opt/Scriptcase/v9-php81/components/drivers/instantclient | Download |
| PDO_INFORMIX | /opt/Scriptcase/v9-php81/components/drivers/IBM/informix | Download |
| PDO_IBM, IBM_DB2 | /opt/Scriptcase/v9-php81/components/drivers/IBM/Db2/dsdriver/ | Download |
5 - Configure Scriptcase Apache.
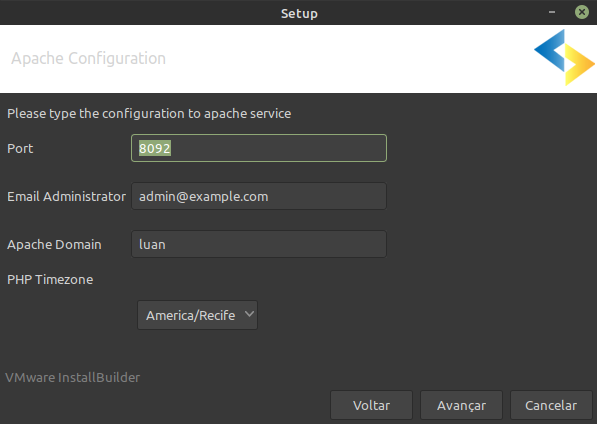
Port
Here will define in which port the Scriptcase Apache service will run on. We recommend using the value set in this installation (8092).
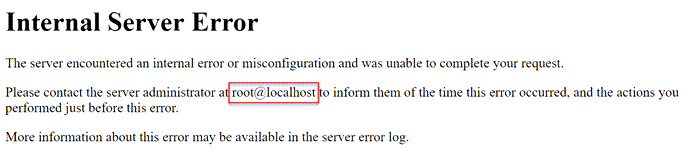
Admin Email
You can configure Apache administrator email for better control of your environment. This setting serves as information when a server error occurs. A message will appear along with the administrator email to be contacted.
Apache Domain
The Apache domain must be set here. We do not recommend making any changes to the default value.
PHP TimeZone
In this option, you can set your PHP TimeZone. It is recommended to select the option corresponding to your time zone. You can check the list of available TimeZones here.
Click Next to continue.
6 - Clicking “Next” will start the installation process.
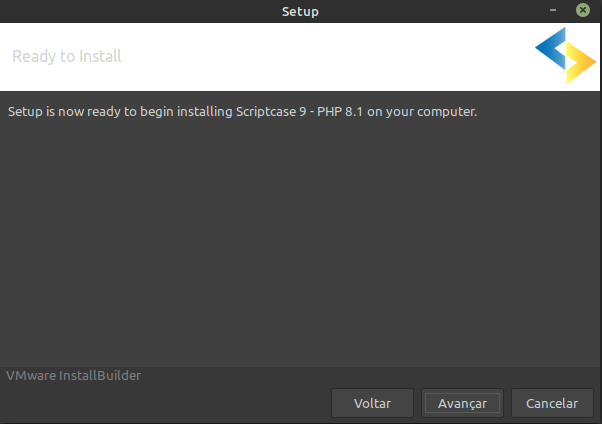
Wait until all components are installing and the environment is set up.
7 - Complete the installation.
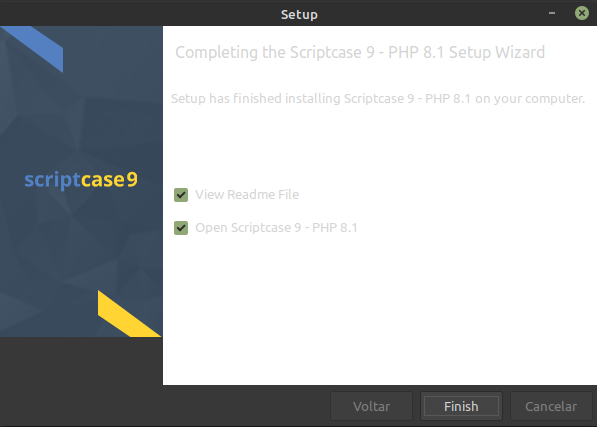
View the “Read Me” file
Clicking finish you will be redirected to the “Read Me” page with all the necessary initial information and useful links.
Open Scriptcase 9
Clicking “Finish”, will open Scriptcase in your default browser.
Access the Scriptcase
1 - To access your Scriptcase, you need to open your browser and enter the local IP or domain of the ported server you selected in the Apache setup.
Example 1: http://127.0.0.1:8092/scriptcase
Example 2: https://yourdomain.com:8092/scriptcase
2 - Login to Scriptcase
After accessing the Login page, you must enter the username and password to proceed to your development environment.
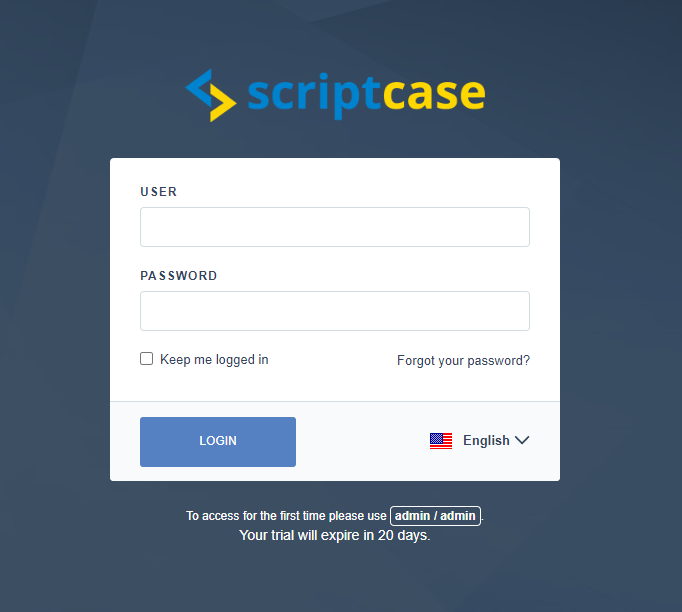
User
In this field, you must enter the user to login to Scriptcase. By default, the user is admin.
Password
In this field, you must enter the password to login to Scriptcase. By default, the password is admin.
Keep me logged in
This option keeps the user logged in until they log out through the Scriptcase interface.
Forgot your password?
IMPORTANT: Password recovery will only be possible if you have configured your SMTP information. To access our documentation showing how to perform this configuration click here.
By clicking on this option, it is possible to recover the password of the informed user. An email will be sent to the user so they can access the recovery steps.
Need to register your Scriptcase? You can access our knowledge base to understand all the steps for registering a Scriptcase license.