Installing PHP 8.1 - Windows
This documentation will walk you through the steps necessary to install PHP 8.1, Apache 2.4, and Scriptcase manually. When performing this type of installation, you are responsible for configuring your entire environment as well as database extensions.
You can install the Scriptcase with PHP 7.3 or PHP 7.0: See how to install with PHP 7.3 See how to install with PHP 7.0
Listed below are all the supported operating systems as well as the libraries that are required to function on a particular system.
Compatibility Table
Scriptcase Automatic Installer is compatible with the following Windows versions
| Windows | Windows Server |
|---|---|
| Windows 11 | Windows Server 2022 |
| Windows 10 | Windows Server 2019 |
| Windows 8.1 | Windows Server 2016 |
| Windows 8 | Windows Server 2012 R2 |
| Windows Vista SP2 | Windows Server 2012 |
| Windows 7 SP1 | Windows server 2008 R2 SP1 |
| Windows server 2008 SP2 |
For Windows 7 SP1, you must verify if the system has the following items installed: Visual C++ Redistributable Packages for Visual Studio (2008, 2010, 2012, 2013, 2015) x86 and x64.
Prerequisites
If you already have a Web Server with Apache and PHP 8.1 configured, just go to How to Enable SourceGuardia Loader and proceed to manual installation.
To proceed with the installation, you need to download some files.
Check below for the files you will need:
- PHP 8.1 NTS (x86 or x64): Click Here
- Apache 2.4 (x86 or x64): Click Here
- mod_Fcgi (x86 or x64): Click Here
- SourceGuardian Loader 13.0.3 for Windows (x86 or x64): Click Here
- Scriptcase (.zip): Click Here
NOTE: Before proceeding with the installation, it is recommended not to have any other web environments installed (such as WampServer, XAMPP, Zend Server, etc.) on your operating system.
Below are the actions required after downloading the items specified above::
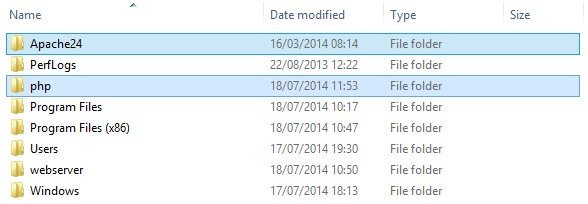
1 - Unzip the PHP and Apache files in separate folders on your operating system’s C: drive.
2 - Rename the PHP folder to php. The result should be like this:
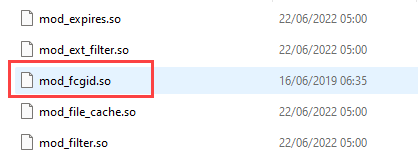
3 - Unzip the mod_Fcgi file, copy the mod_fcgid.so file to the C:\Apache24\modules folder.
Configure the Apache environment
Listed below are the steps required to configure apache manually. Follow the steps correctly to avoid problems installing and starting the service.
NOTE: Since PHP and Apache folders are at the same directory level (C:) You do not need to enter the root folder in directives that require you to enter isolated paths or points to a specific file.
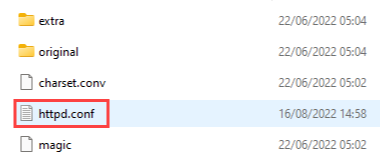
1 - Edit the httpd.conf file located in the C:\Apache24\conf\ folder using a text editor in Administrator mode, so that any changes you make are saved.
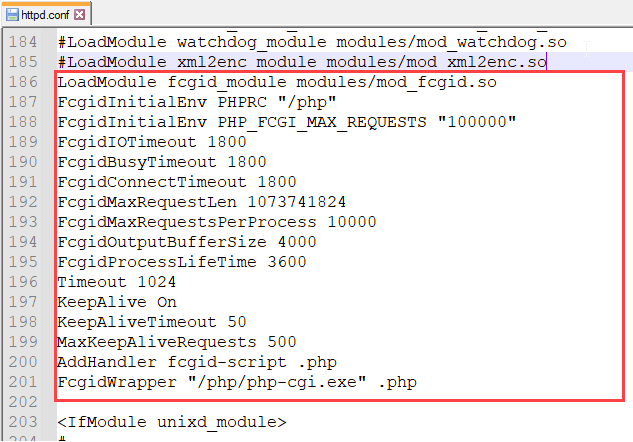
2 - Add the content below after the #LoadModule xml2enc_module modules/mod_xml2enc.so line:
LoadModule fcgid_module modules/mod_fcgid.so
FcgidInitialEnv PHPRC "/php"
FcgidInitialEnv PHP_FCGI_MAX_REQUESTS "100000"
FcgidIOTimeout 1800
FcgidBusyTimeout 1800
FcgidConnectTimeout 1800
FcgidMaxRequestLen 1073741824
FcgidMaxRequestsPerProcess 10000
FcgidOutputBufferSize 4000
FcgidProcessLifeTime 3600
Timeout 1024
KeepAlive On
KeepAliveTimeout 50
MaxKeepAliveRequests 500
AddHandler fcgid-script .php
FcgidWrapper "/php/php-cgi.exe" .php
Example:
WARNING: This setting will only work if you have copied the mod_fcgid.so file to the
C:\Apache24\modulesfolder as previously instructed.
3 - Search for #ServerName www.example.com:80 and change this line to ServerName localhost:80.
In this tutorial apache is configured with port 80. To define another port it is necessary to change the value informed in ServerName, for example (localhost:8092). Also, you will need to change the
Listen, for example (Listen 8092). Before changing you must make sure that the port is not being used by another service
4 - Change the contents of the DirectoryIndex directive by adding the following contents to the directive line:: index.php index.phtml.
Example:
<IfModule dir_module>
    DirectoryIndex index.html index.php index.phtml
</IfModule>

5 - Set the ${SRVROOT} variable with your Apache folder path:
Search for the Define SRVROOT and edit it as follows:
Define SRVROOT "/Apache24"
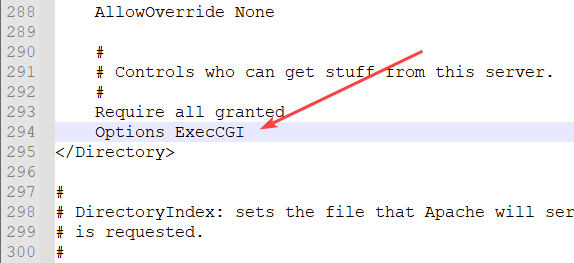
6 - Add the Options ExecCGI command below the Require all granted line in the <Directory "${SRVROOT}/htdocs"> directive.
    #
    Require all granted
	Options ExecCGI
</Directory>
Example:
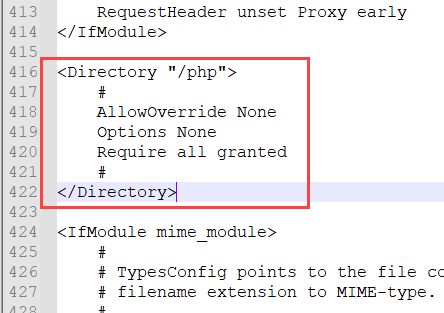
7 - Search for the <IfModule mime_module> directive and add the content below above this directive:
<Directory "/php">
    #
    AllowOverride None
    Options None
    Require all granted
    #
</Directory>
Example:
After performing all these procedures, save the httpd.conf file to proceed with Apache installation and startup and PHP configuration.
Install and start Apache
Now that you have set up your apache service, all you have to do is install and start it. Below are the steps that must be followed to successfully complete this process.
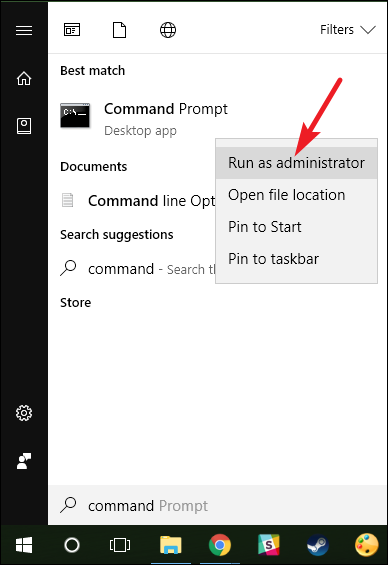
1 - Run the Command Prompt (CMD) with Administrator privileges:
2 - Go to the Apache bin folder to install the httpd.exe executable file:
cd C:\Apache24\bin\httpd.exe
3 - Install Apache with the command below:
httpd.exe -k install
Wait for the message “The ‘Apache2.4’ service is successfully installed.” to proceed.
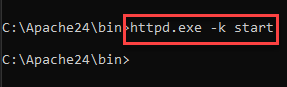
4 - Start the Apache service and verify if it is working.
Use the httpd.exe -k start to start your Apache service.
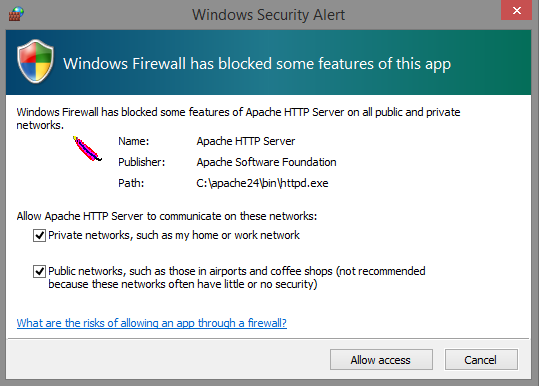
5 - Grant execution permission to Apache on your Firewall:
Select the two options available to grant permission, so Apache can function properly.
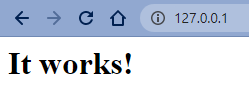
6 - Check if Apache is active.
To verify that the service is active, simply visit the Apache test page in your browser. You can do it in two ways:
127.0.0.1 or localhost
Configure the PHP 8.1
With Apache active and functional, you now need to define and configure the PHP.ini file so those database extensions and libraries are available for use by Scriptcase.
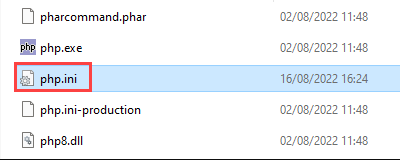
1 - Access the PHP folder in C:\ and rename the php.ini-development file to php.ini.
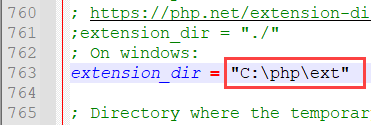
2 - Access the php.ini file with a text editor using Administrative privileges and search for the ;extension_dir = "ext" directive.
Assign value “C:\php\ext” to this directive and remove ;.
Example:
extension_dir = "C:\php\ext"
3 - Enable the extensions listed below, by uncommenting them (Remove the semicolon ; at beginning of line).
Default Extensions
extension=bz2extension=curlextension=gd2extension=gettextextension=imapextension=ldapextension=fileinfoextension=mbstringextension=opensslextension=exifextension=xslextension=soap
Database Extensions:
| Extensions | Driver enabled in Scriptcase |
|---|---|
extension=mysqli |
MySQLi |
extension=odbc |
DB2 ODBC GENERIC, DB2 ODBC GENERIC 6, Generic ODBC, MS Access ODBC, MS SQL Server ODBC, Oracle ODBC, Progress |
extension=pdo_mysql |
MySQL PDO |
extension=pdo_odbc |
DB2 PDO ODBC, Progress PDO ODBC, Sybase PDO ODBC |
extension=pdo_pgsql |
PostgreSQL PDO |
extension=pdo_sqlite |
SQLite PDO |
extension=pgsql |
PostgreSQL 6.3 or below, PostgreSQL 6.4 or above, PostgreSQL 7 ou Acima |
NOTE: Some database extensions will depend on third party drivers to be enabled. Click here to access configuration instructions for your desired database.
4 - Set the recommended minimum value of these PHP directives listed below for Scriptcase to work proprely. Search for the directives and assign the value according to this example:
max_execution_time = 3600max_input_time = 3600max_input_vars = 10000memory_limit = 1024Mpost_max_size = 1024Mupload_max_filesize = 1024Mmax_file_uploads = 200short_open_tag = On
IMPORTANT: By default PHP can disable some functions that are important for Scriptcase to function properly. Search for the disable_functions directive and make sure it is as follows:
disable_functions=. Click here to access the list of functions required for Scriptcase to function properly.
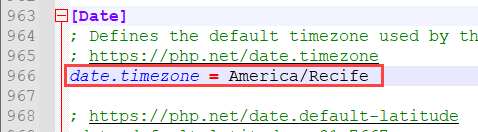
5 - Set up PHP TimeZone according to your region. You must use the value available in PHP documentation. Search for the date.timezone line, uncomment it and edit it according to the selected TimeZone:
Example:
date.timezone = America/Recife
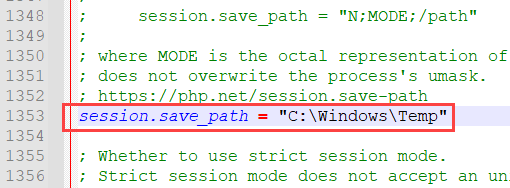
6 - Set the folder where temporary files will be stored. Search for the ;session.save_path line, uncomment it, and enter the path to your temporary folder.
Example:
session.save_path = "C:\Windows\Temp"
7 - Save all changes made to the php.ini file.
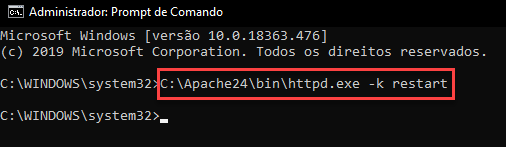
8 - Restart the Apache service using the Command Prompt (CMD) with Administrator privileges the following command:
C:\Apache24\bin\httpd.exe -k restart
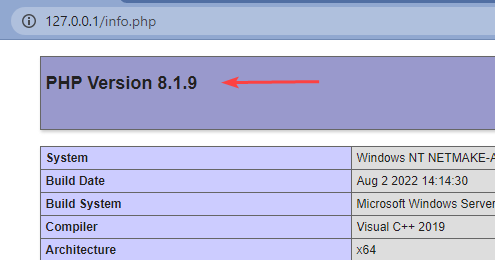
9 - Verify changes made through the info.php file. You need to create this file and place it in the C:\Apache24\htdocs directory with the following content:
<?php
    phpinfo();
?>
After this, check the generated page in your browser by going to the URL 127.0.0.1/info.php.
NOTE: For more information about the phpinfo() function, check the documentation do PHP.
Enabling the SourceGuardian Loader
Before you start the Scriptcase installation, you need to enable the loader responsible for encrypting Scriptcase in PHP. Follow the steps below to perform this action successfully.
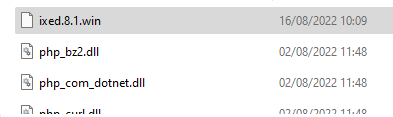
1 - Extract the SourceGuardian Loader file downloaded at the beginning of this documentation.
If you haven’t downloaded it yet click here and download the file according to the architecture used.
2 - Copy the ixed.8.1.win file and paste it into the PHP extensions directory C:\php\ext.
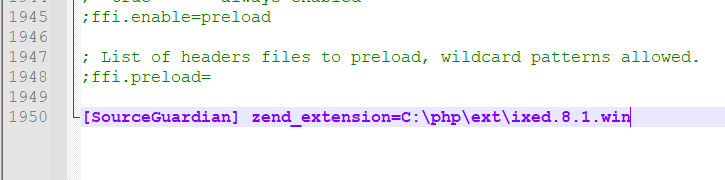
3 - Edit the php.ini file and below the last line enter the path to the extension within the zend_extension parameter:
Example:
[SourceGuardian] zend_extension=C:\php\ext\ixed.8.1.win
4 - Restart the Apache service using the Command Prompt (CMD) with Administrator privileges the following command:
C:\Apache24\bin\httpd.exe -k restart
Manual Scriptcase Installation
Listed below are the steps needed to do a Scriptcase manual installation. To do the steps, it is needed that you have a web server configured in your machine.
1 - Download the Scriptcase (.zip) directly from the download page from our website.
2 - Extract the .zip file and rename the extracted folder to scriptcase.
3 - Move the scriptcase to your server root. Depending of your operating system and the installation the path can be different from the example. However, by default the paths are:
| Windows | Server |
|---|---|
C:\Apache24\htdocs\ |
Apache |
C:\inetpub\wwwroot\ |
IIS |
| Linux | Server |
|---|---|
/var/www/html/ |
Linux Local |
/home/$(whoami)/public_html/ |
Linux Server |
| macOS | Server |
|---|---|
/Library/WebServer/Documents |
Apache |
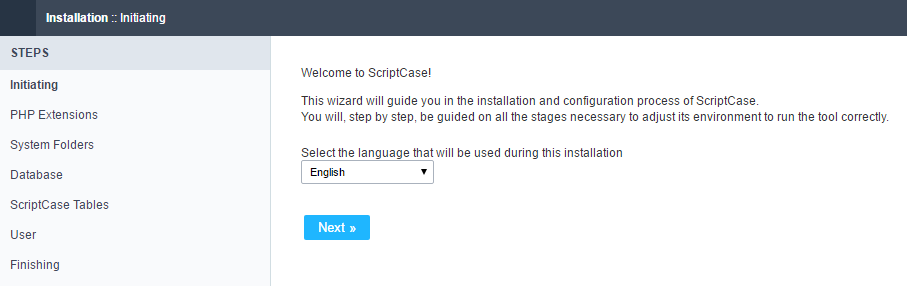
4 - Access the Scriptcase using your browser:
127.0.0.1/scriptcase
- By default the selected language is English.
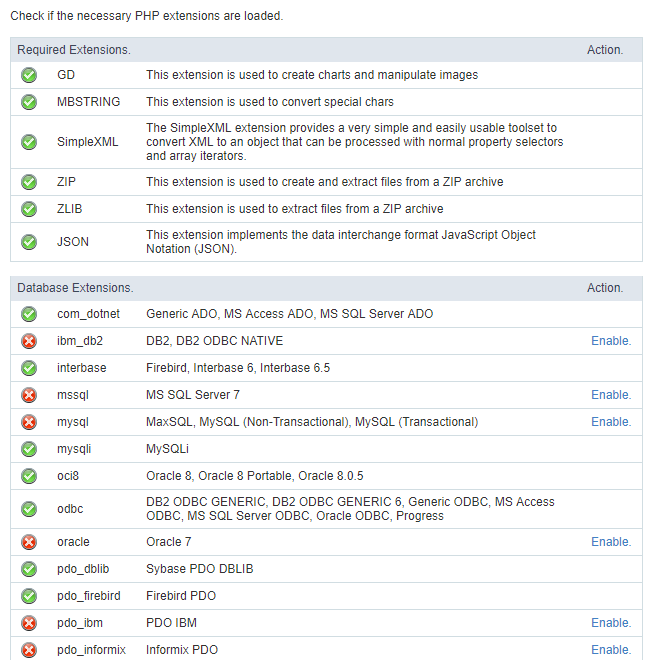
5 - Check the extensions required for Scriptcase to function and database connection modules that are enabled.
Typical Installation
Check the steps below to complete the manual installation of Scriptcase in a typical way.
NOTE: By selecting this installation, Scriptcase will set your environment by default. Defining the installation database and the login user in Scriptcase.
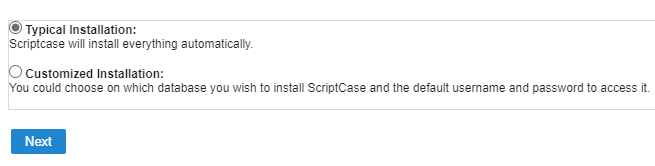
After clicking proceed, you will be redirected to the Scriptcase Login page.
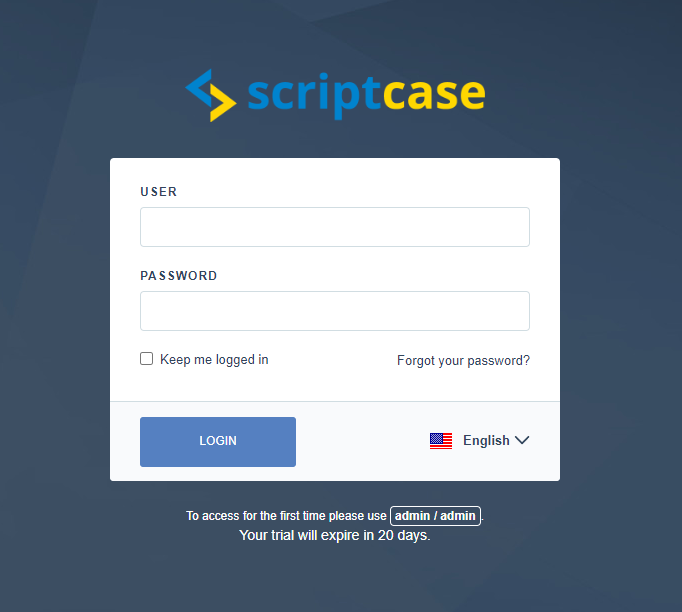
User
In this field, it is necessary to inform the user to login to Scriptcase. By default, the user is admin.
Password
In this field, you must enter the password to login to Scriptcase. By default, the password is admin.
Keep me connected
This option keeps the user logged in until they log out through the Scriptcase interface.
Forgot your password?
By clicking this option, it is possible to recover the password of the informed user. An email will be sent to the user in question so they can access the recovery steps.
Important: You can only perform password recovery if you have configured your SMTP information. To access our documentation showing how to perform this configuration click here.
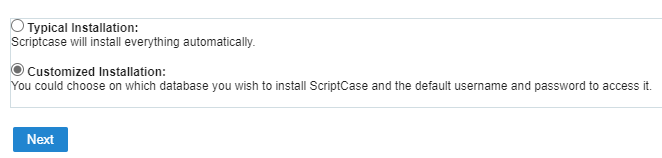
Custom Installation
Check the steps below to complete the manual installation of Scriptcase in a custom manner.
NOTE: By selecting this installation, you will be responsible for setting up your environment. Defining the installation database and the login user for Scriptcase.
1- Verify that the directories required by Scriptcase have the correct permissions. If any directory listed does not have the active check icon ![]() , correct permission for this directory.
, correct permission for this directory.
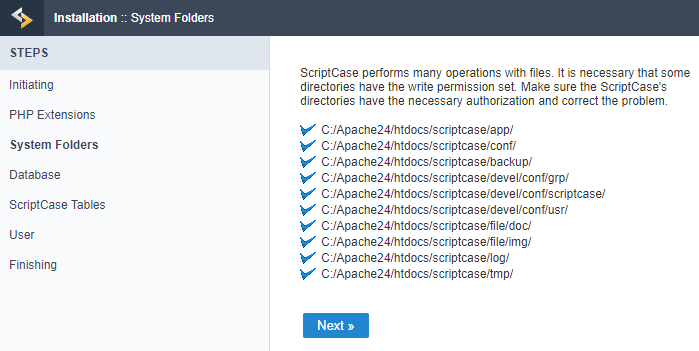
Click proceed to proceed with the installation process .
2- Choose the database where the Scriptcase database will be installed. By default, Scriptcase recommends that it be installed with the SQLite database.
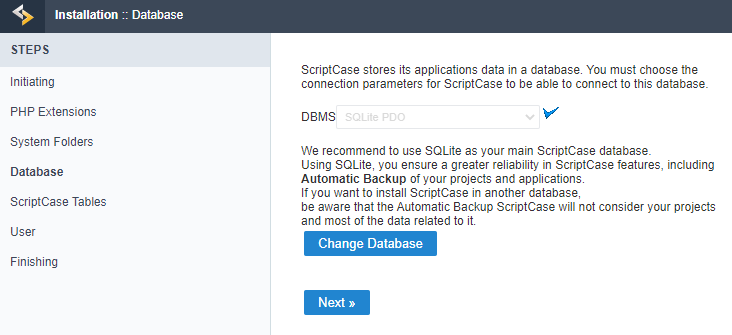
- You can change the default database by clicking the Change Database button. By clicking this option you will need to set the following options:
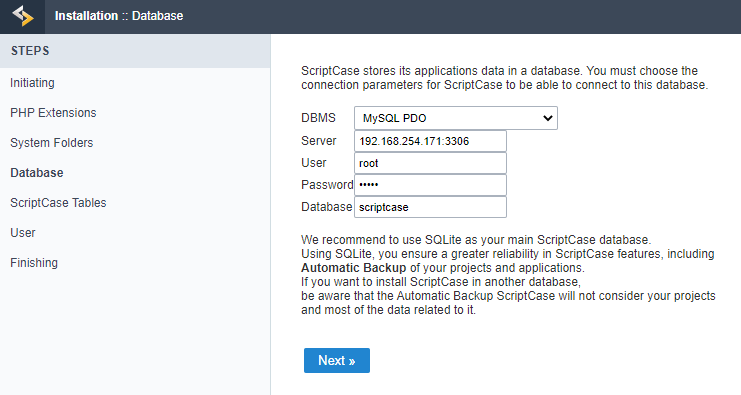
DBMS
In this option, you will select the Driver to connect to your database.
Server
In this option, you will inform the server to connect to the desired database.
User
You need to inform a user who has access to the database you want Scriptcase to be installed on.
Password
You must enter the authentication password corresponding to the entered user.
Database
You must enter the name of the database where Scriptcase will be installed.
Example:
scriptcase
Clique em prosseguir para avançar no processo de instalação.
3 - Verifique se a criação das tabelas da base de dados do Scriptcase ocorreu com sucesso. As tabelas serão marcadas com o ícone de sucesso ![]() na lateral.
na lateral.
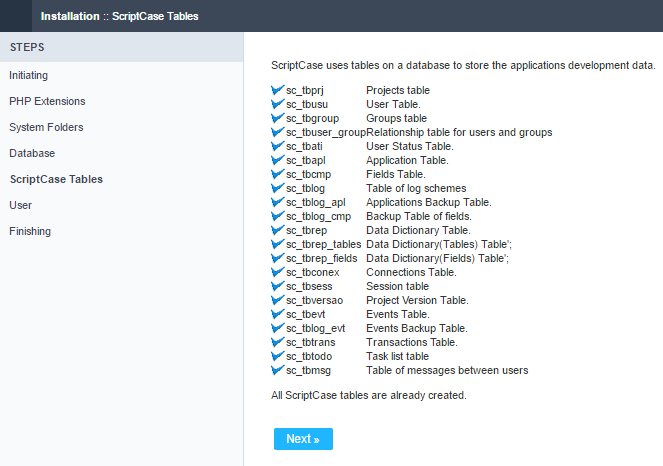
Click proceed to proceed with the installation process.
_4 -__ Set the default user who will have access to Scriptcase.
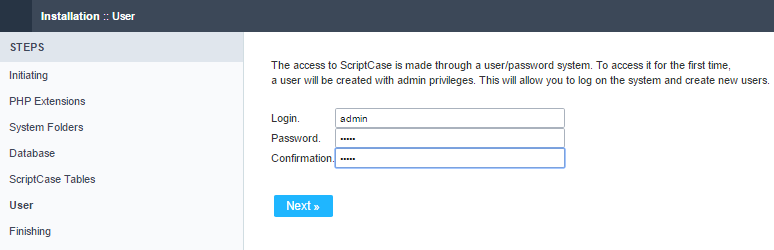
Login
In this option, you will enter the default Scriptcase User Login.
Password
In this option, you must enter the password that will correspond to the user informed.
Confirmation
You must repeat the previously entered password for successful user creation.
Click proceed to proceed with the installation process.
5 - Complete Scriptcase custom installation on your web server.
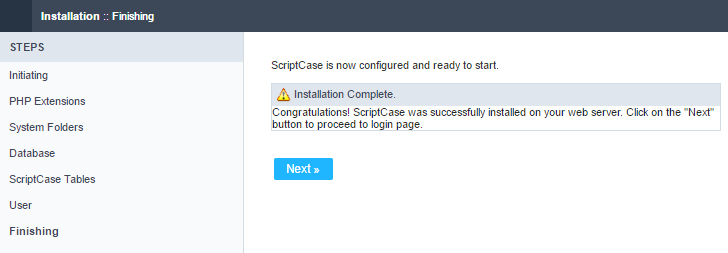
After clicking proceed, you will be redirected to the Scriptcase Login page.
User
In this field, it is necessary to inform the user to login to Scriptcase. By default, the user is admin.
Password
In this field, you must enter the password to login to Scriptcase. By default, the password is admin.
Keep me connected
This option keeps the user logged in until they log out through the Scriptcase interface.
Forgot your password?
By clicking this option, it is possible to recover the password of the informed user. An email will be sent to the user in question so they can access the recovery steps.
Important: You can only perform password recovery if you have configured your SMTP information. To access our documentation showing how to perform this configuration click here.