New Project
 View video
In this article you learn how to create a new project within Scriptcase.
A system made with Scriptcase has always to start by creating a project. A project for Scriptcase is a set of applications with some standard settings. During the project creation, you define some essential options as name and description, languages in which your project might be available, a layout template for the applications, and informs the database system connection data in which the applications fetch the information to form the system.
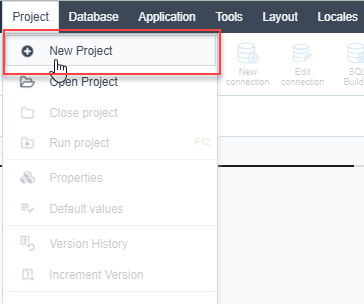
To start a new project you can access the menu “Project > New Project”.
The project creation process has five steps, which are: Start, Database, Languages, Themes and End .

Start
In this step, we should choose between a Blank project, where we have to create our database connection and every application from scratch, or one select of our Template projects, that can serve as a template to the creation of your system.
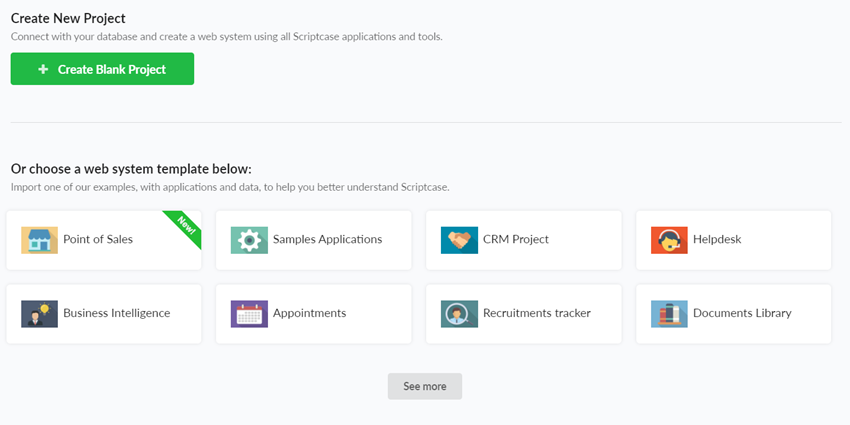
NOTE: Click on “See more” button to have access to our Sample Projects and click in the link here to know how to import them.
After we select Create Blank project, it is mandatory to define a name to our project.
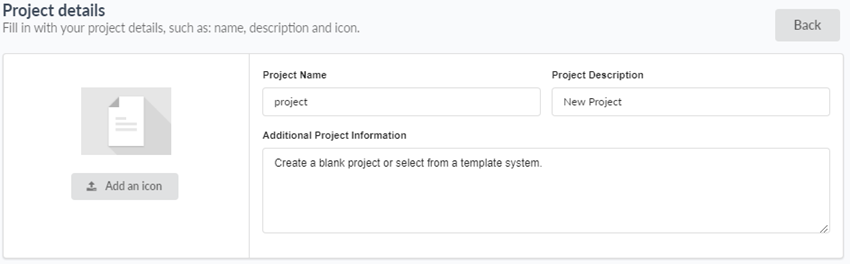
Project name
The only mandatory setting for this step is that the name must contain 1 to 32 alphanumeric characters and does not allow it to start with a number.
Project description
A not required that allows us to define a description for the project.
After the creation of the project, we can see the description in the dialog box when we place the mouse over the project when we use the gallery view or in the Description column when the project’s view is in list format.
Additional Project Information
Not required fields that allow us to add additional information to the project. This information is within the project properties.
Image
Not required fields that allow us to define an image to represent our project.
You can change all non-mandatory fields in this step, and other project settings after project creation by accessing the option Project Properties.
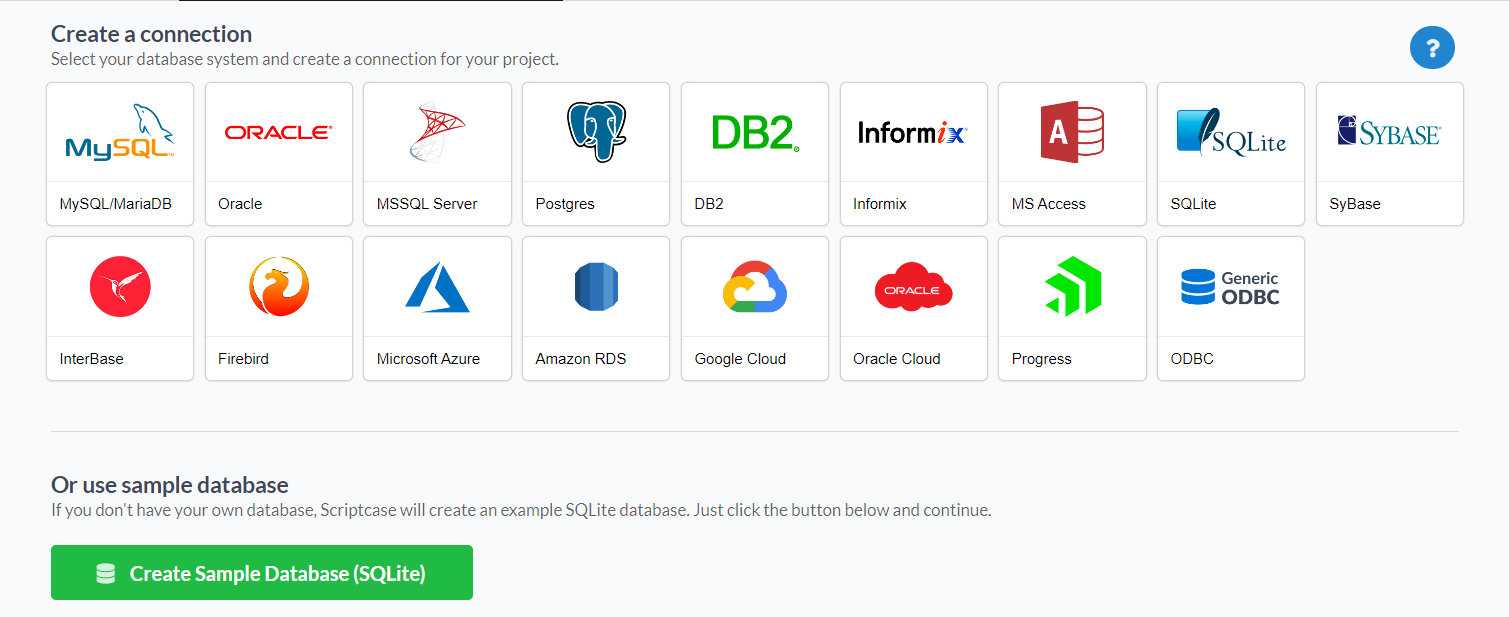
Databases
During the connection creation, Scriptcase lists all database systems according to your license. If you’re evaluating, Scriptcase displays all database systems available. You have to select your database and proceed to the next step to inform the database connection details.
You need to have a database system installed and the permissions to connect before you proceed.
Note: If you don’t have a database available to create the project, Scriptcase provides a sample database in SQLite with the tables ready for the user to proceed with the creation of the project. To create this database just click on the button Create Sample Database (SQLite).
The information required to connect is different for each database. In this example we will be using MySQL. To learn more about other connections please access this link.
Using Scriptcase you are able to create as well as to manage database projects and tables. During this step you will need to create or connect to, at least, one database project. We are going to use a “Samples” one. After the project creation you are able to use the Database manager and SQL Builder features to manage the database project and queries.
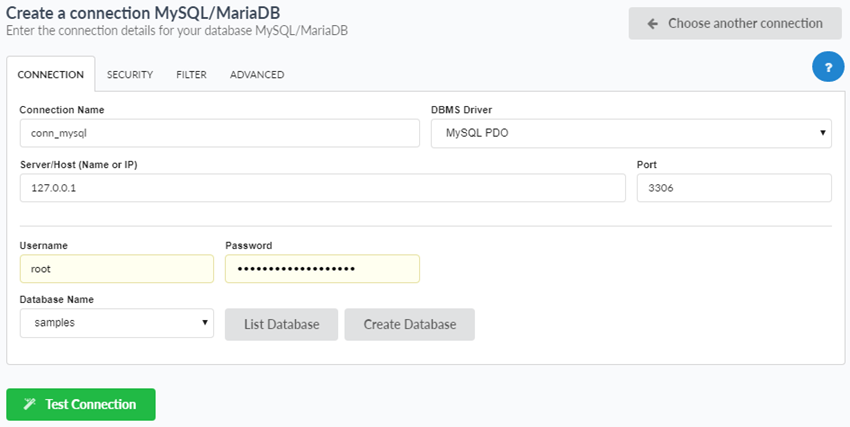 Database connection details.
- Connection Name: Define the name of the connection. You are not able to change this name in the future.
- DBMS Driver : Defined as MySQL PDO. It can also be MySQLi.
- Server/Host (Name or IP): Enter the IP of the server where the database is. If the database is on the same machine of Scriptcase, you can use the IP 127.0.0.1 or localhost. If the Database is
- Port: Define the port of the connection. By default, the port is 3306.
- User: Inform the username that you use to connect to your database.
- Password: Inform the password that you use to connect to your database.
- Database Name: Click on the “List Database” and select the desired database.
- Test Connection: Displays the connection status if it succeeded or not.
All available connections are listed according to on your license type.Go to our on-line store and view the available licenses.
If you have connection problems, access our free support to get assistance by chat or remote access.
Language
In this step, you should select the languages that are available for system development.
Scriptcase can easily create multilingual systems. You need to add more than one language in this step of the project. All the languages you choose are available to the project, and you must choose one as standard. You can also have the same language more than once using different regional settings.
Scriptcase will automatically translate and apply the regional settings to your project applications (for buttons and internal messages for example). You can also use another tool from Scriptcase called Data dictionary to import and translate your database fields. You will be able to see, create or customize the messages inside the menu > Locales > Application language.
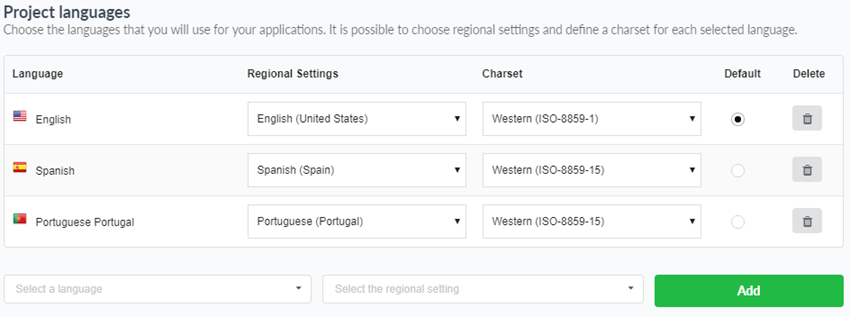
- Language - List of languages that are in the projects.
- Regional Settings - Contains the standard regional settings for the selected language. Regional Settings allows you to define some parameters of monetary units, dates, and numbers according to the country or region where your application.
- Charset - Sets the character encoding format for the application. This encoding must be the same used in your database. By default, the charset comes according to the language, and you can change after creation in project properties.
- Default - Sets the project default language. Project applications are performed and displayed using this default language; it can also be changed individually within the application settings.
- Delete - Removes the language of the project. In this way, the language removed will no longer be available. It may also be included or deleted after the project created within the Menu > Project > Properties.
After selecting the language, regional setting, and charset, click “Add” and then “Save” to move forward.
Themes
In the themes selection, you can choose one more than templates for your project. Within this template you will have a complete theme for all applications you create within the project. Ready to use screens with pre made CSS and HTML to all application types.
You can also customize or create new themes from the templates. Once you are inside the projects, access the menu Layout > CSS Application (Themes).
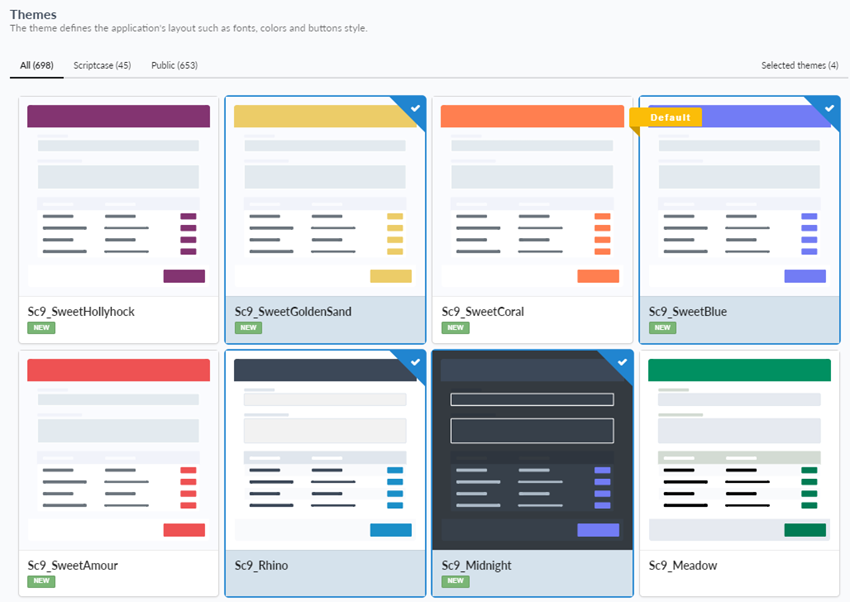
- All - Lists all the available themes for use in your project.
- Scriptcase - Lists all Scriptcase standards themes.
- Public - Lists all themes defined in the Public level.
- Selected themes - Lists the themes selected for use in the project.
To add a theme to your project, you only need to select it, and then it is going to be listed inside the selected themes. You should select a theme to use as default, for this click on the “default” icon of the selected theme. The default theme is the one selected every time you create a new application, and you can also select a different one according to the options available within the selected themes. You can also access this option in the future to add new themes.
When you add more than one theme, you can dynamically switch themes before creating the applications, by adding a toolbar button within the applications or using the macro sc_set_theme.
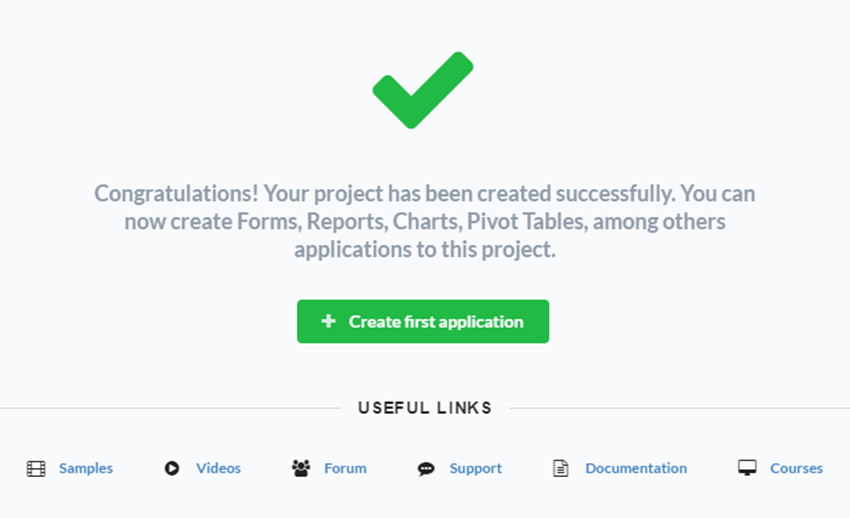
End
The project has been created successfully with the basic settings, and now you can create the applications. Visit the Applications menu to learn more about each application and to see the steps to create them.