Importing a template Project
 View video
In this tutorial, you learn how to import a project template from Scriptcase. The project templates contain various samples applications for you to copy or learn how to apply Scriptcase features. You can run all the template projects to test by accessing the website here.
The process of importing a template is divided into two steps, which are detailed below.
The projects created with access permission for the user, appear in Project List.
Start
During the first step of the project creation, you can create a Blank project or Import a template according to the options below.
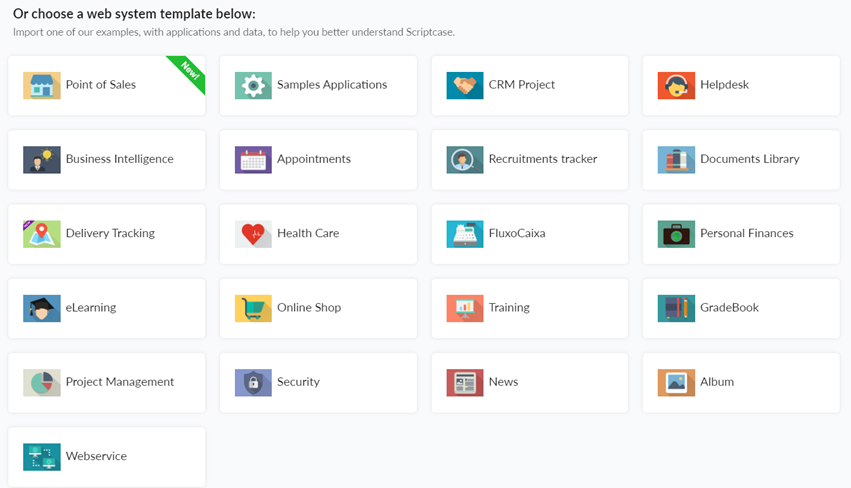
When you import a project template, Scriptcase will delivery some ready to use applications and also the database tables. Here you see the steps to import one template project, the “Samples.”
First, you need to choose the project and customize all the details. Description and image are optional.
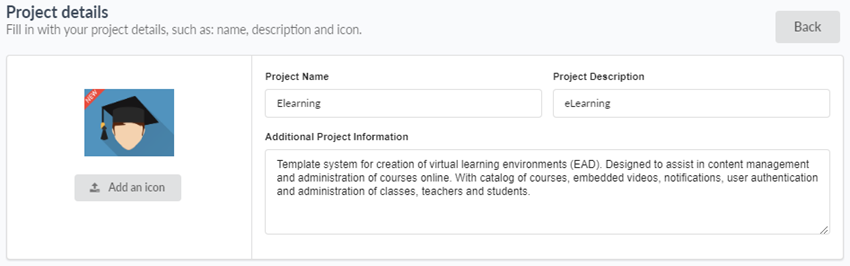
- Project Icon - You can select a project icon for display purposes in the project list. This field is not required, and you may change after creation inside project properties.
- Project Name - The project name must contain 1-32 alphanumeric characters, without space neither special characters.
- Project Description - Here, you give a brief description of the project, not required, also able to inform after the creation of the project.
- Additional Project information - Here, you can add some additional information you want for the project. This field is not required, and you may change after the creation of project properties.
Database
Our template projects are available for MySQL, Oracle, SQL Server, PostgreSQL, Access, SQLite, Firebird.
You can choose to use the default connection or to configure a new connection to your database.
Use default connection (SQLite)
By clicking on the option “Use default connection (SQLite),” Scriptcase undertakes to create a database, with the SQLite database, and insert all the information of tables and records. The database file with the project tables and some dummy records within the Scriptcase directory.
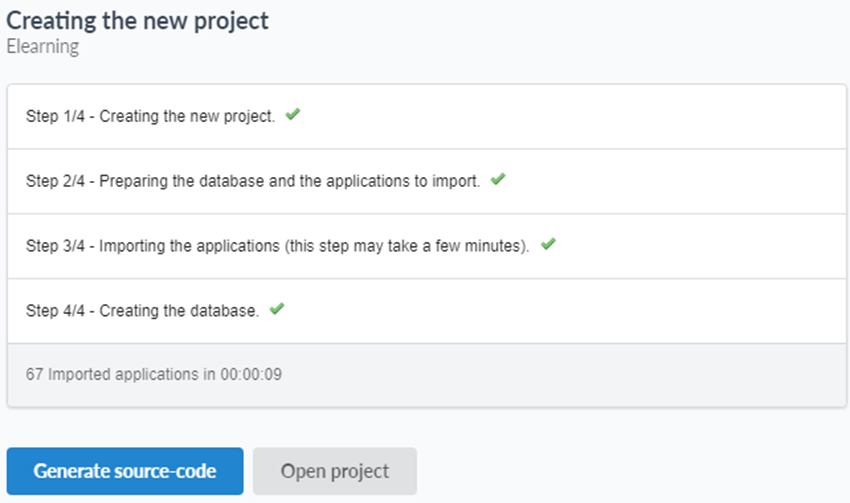
The project will be created and configured with all the essential information. Generate the source code to compile and applications and then “open project” and view all the applications created or “Run” the project to open the initial application
Create a new connection to my database
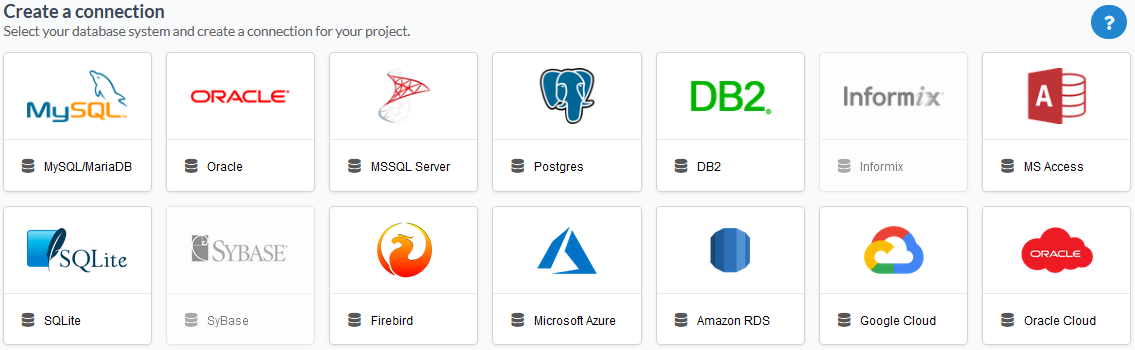
After selecting the database you want to connect, enter the required data to perform the connection.
The information needed to create a connection varies according to the selected database. In the example below, we show with MySQL connection. For more details on how to connect your database click here.
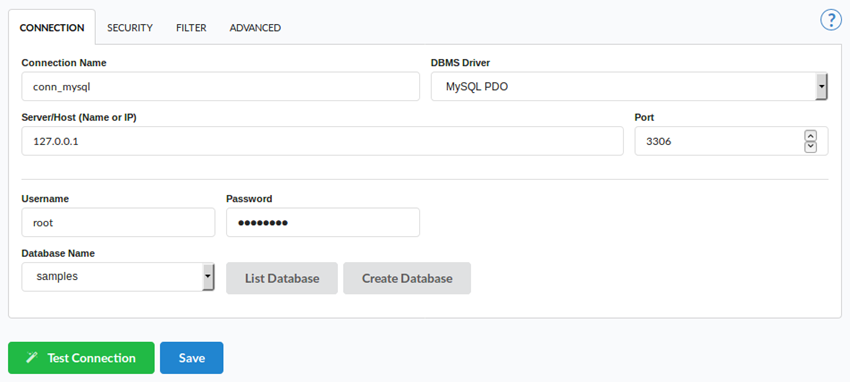
- Connection Name: Define the name of the connection. You can change this name in the future.
- DBMS Driver : Defined as MySQL PDO. It can also be MySQLi.
- Server/Host (Name or IP): Enter the IP of the server where the database is. If the database is on the same machine of Scriptcase, you can use the IP 127.0.0.1 or localhost.
- _Port _: Define the port of the connection. By default, the port is 3306.
- User: Inform the user name that you use to connect to your database.
- Password: Inform the password that you use to connect to your database.
- Database Name: Click on the “List Database” and select the desired database.
- Test Connection: Displays the connection status if it succeeded or not.
If you don’t have a database created, click on the button “Create Database” and the window below appears.
The option of Create Database is available for: MySQL/MariaDB, MSSQL Server and PostegreSQL
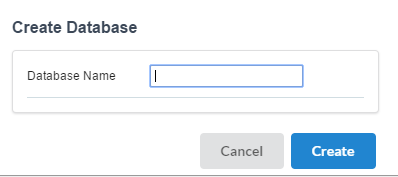
Enter a name for your database and click “OK.” After that, the database created will be displayed on the database list. To create a database directly from Scriptcase, you need to have the correct permissions within the database system itself, and sometimes this permission is refused, especially when you have the database in another server. In this example, we have the database located on the same server, localhost.
Project Generation
After you finish, Scriptcase undertakes to create all the tables and insert all the information used in applications.
All set! Now the project will be created and configured with all the essential information. Generate the source code to compile the applications and then open project and view all the applications created.