Connecting withte Oracle ODBC
In Scriptcase, we have the following drivers available for connections with Oracle: Oracle PDO, Oracle 8.0.5 or Higher, Oracle ODBC and Oracle 8. If you are using your own pre-configured environment, Oracle extensions must be manually enabled in PHP.
Prerequisites
Before proceeding with this documentation, check your PHP architecture. In order for the drivers to be enabled correctly, the files must be downloaded according to the architecture used.
- In Scriptcase, there is the info.php file, access it through the URL:
http://127.0.0.1:8092/scriptcase/info.php, where you will find information regarding the architecture in phpinfo().
NOTE: If you are using Scriptcase’s automatic installer, the PHP architecture will be the same as the installer downloaded. Download the Oracle Instant Client according to your PHP architecture.
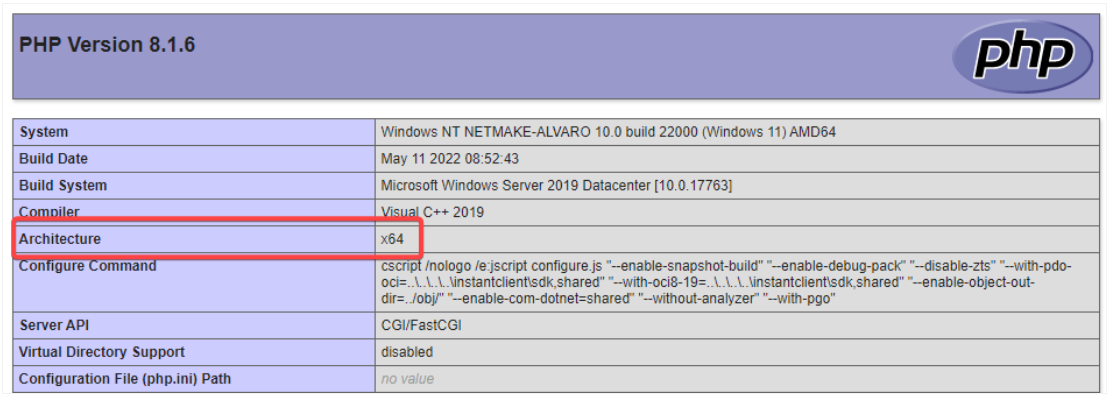
- x86 Architecture = 32 bits
- x64 Architecture = 64 bits
Below are listed the files required for Oracle drivers to be enabled. If you installed the tool using Scripcase installer, it is not necessary to download the Microsoft Visual C++ 2017. For manual installations, you must download and install both versions of Microsoft Visual C ++ 2017.
Required Files:
x64
- Oracle Instant Client 19.6.0.0(x64): Click Here
- Oracle ODBC Package 19.6.0.0(x64): Click Here
- Microsoft Visual C++ 2017(x64): Click Here
x86
- Oracle Instant Client 19.6.0.0(x86): Click Here
- Oracle ODBC Package 19.6.0.0(x86): Click Here
- Microsoft Visual C++ 2017(x86): Click Here
WARNING: PHP 8.1 is compatible with Oracle Instant Client 11 or Higher.
To download Oracle Instant Client lower than version 19.6.0.0, you must have an Oracle Account.
Other Files
- Oracle Instant Client 18.5.0.0 or Below: Click Here
Oracle ODBC Driver Compatibility Table
| Drive | Oracle Database Version | ||||||
|---|---|---|---|---|---|---|---|
| Oracle 8.0.5 or Higher | 9i  |
10g |
11g R1 |
11g R2(11.2)  |
12c |
18c |
19c |
| Instant Client | Versión de base de datos Oracle | ||||||
| 19.6.0.0 | 9i |
10g |
11g R1 |
11g R2(11.2) |
12c |
18c |
19c |
Configuring Oracle ODBC on Windows
Scriptcase’s automatic installation comes with pre-configured Oracle drivers, just missing instant_client and the ODBC package to be configured to make the connection. Follow the steps described below to enable the connection drivers.
1 - Extract the previously downloaded Instant Client Basic package to your computer’s root folder.
E.g., C:\instantclient_19_6
2 - Extract the previously downloaded ODBC package to the Instant Client folder on the root path of your computer.
3 - Run the odbc_install.exe file with administrator privileges for the driver to be installed on your system.
4 - Paste the DLLs listed below into the Scriptcase PHP folder C:\Program Files\NetMake\v9-php81\components\php:
- oci.dll
- oraociei19.dll
- oraons.dll
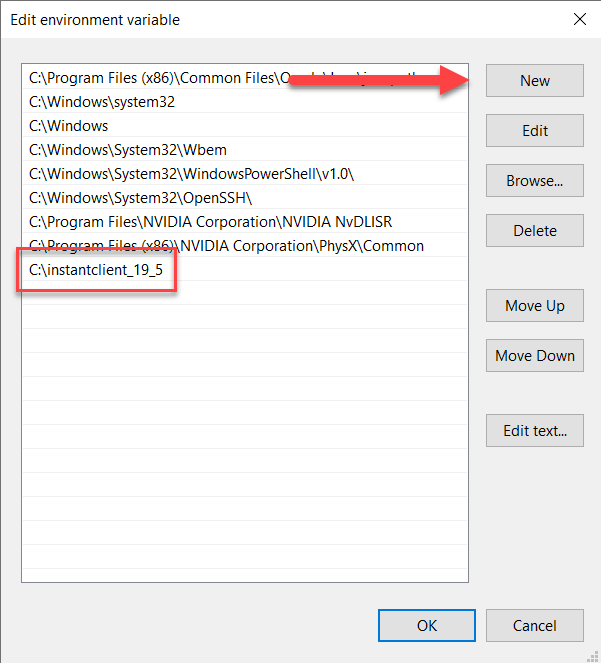
5 - Add in the Path parameter of the Environment Variables the full path to the Instant Client. Follow the steps below to perform this procedure:
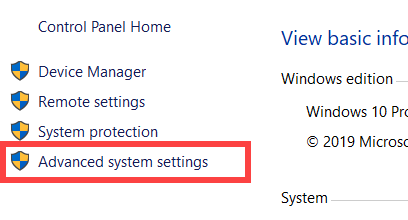
- Go to Control Panel > System > Advanced System Settings.
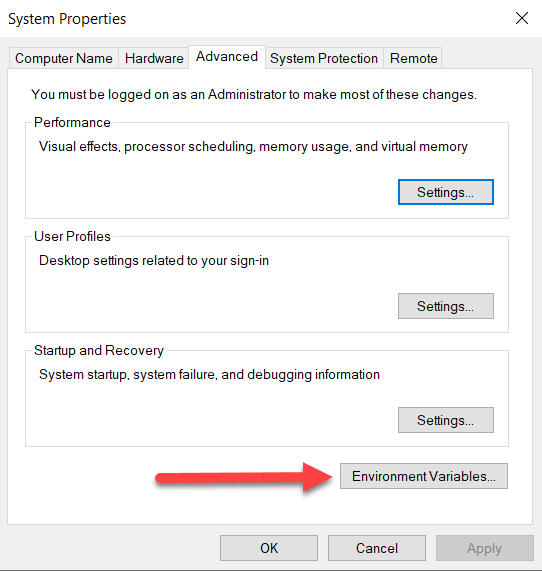
- Click on the Advanced > Environment Variables tab.
- Under System Variables, Select the Path item and click Edit.
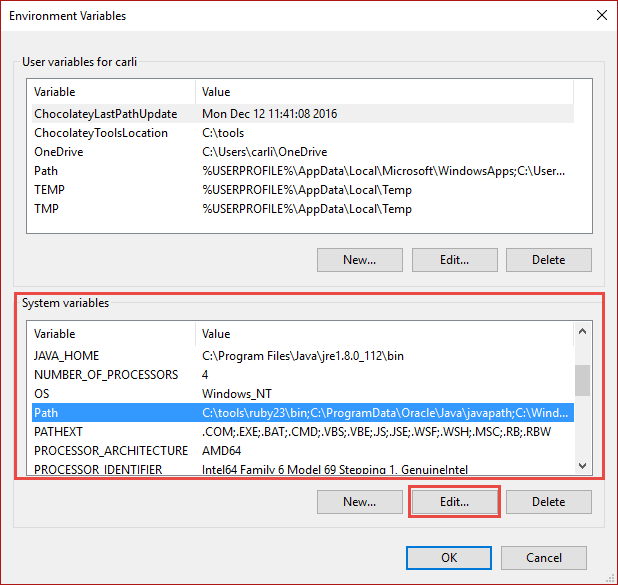
- Click the New button and add the path to the instant client as shown below:
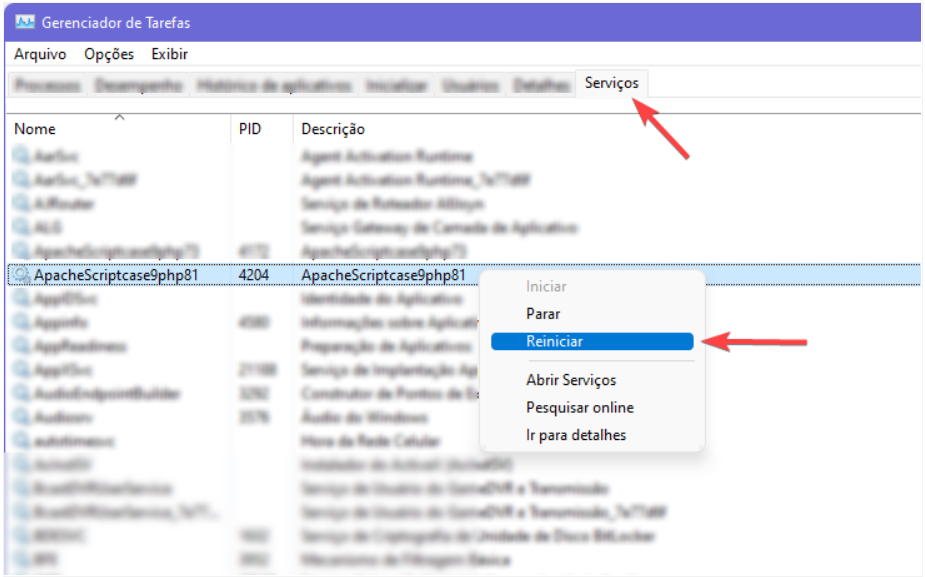
6 - Restart the Apache service using the Task Manager.
-
Open the Task Manager and click on the Services tab.
-
Search for the
ApacheScriptcase9php81service and right click on this service, then Restart.
Creating a System ODBC Data Source
Check below the entire step by step to create an ODBC data source to connect to Scriptcase.
NOTE: ODBC must be created on the same server where ScriptCase is installed.
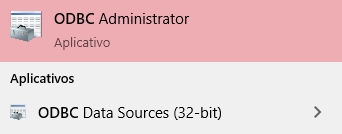
1 - Access your ODBC Data Source Manager and select according to your architecture. We will be selecting the x64 version:
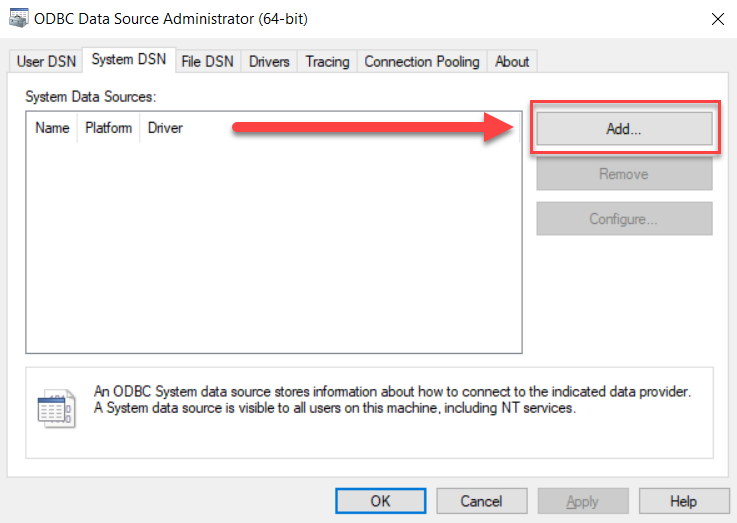
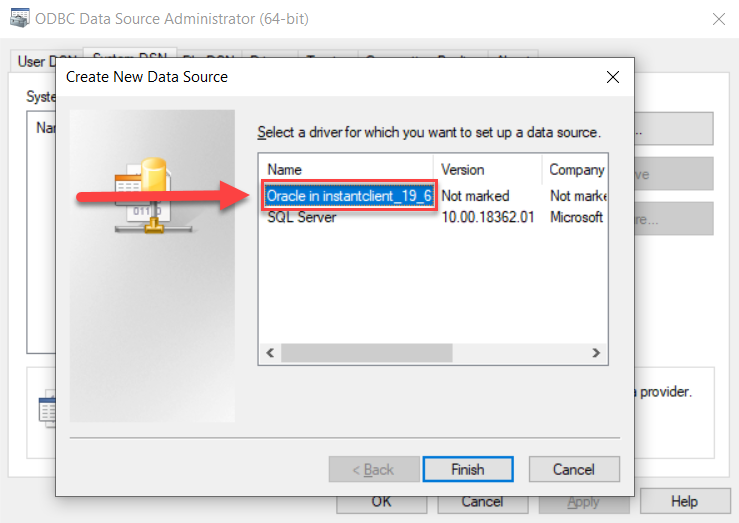
2 - When accessing the ODBC Data Sources Administrator, select the DSN System tab and click on Add to create your connection to your Oracle Database.
3 - After that, it is necessary to select the Driver to connect to Oracle. Select the Driver: Oracle in instantclient_19_5
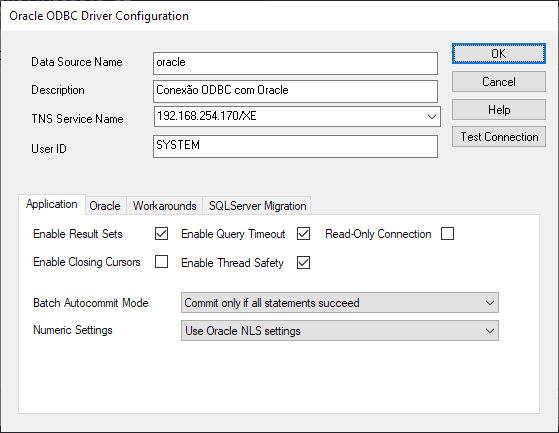
4 - Now, enter the connection parameters as shown below:
- Data Source Name: Define here the name of the ODBC object that will be used when connecting to Scriptcase.
- Description: Write a definition for the Data Source, e.g., what is the purpose?.
- TNS Service Name: Enter the server’s IP or domain here followed by the Oracle SERVICE NAME.
- User ID: Inform the user that will be used in the connection for authentication.
5 - Test the connection to check if all parameters have been filled in correctly.
You will be asked to enter the password to connect.
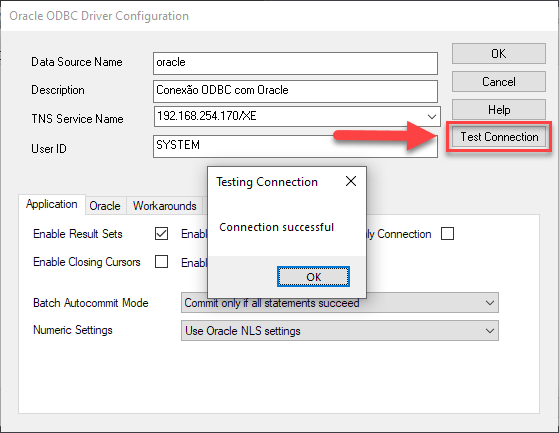
6 - Click OK to complete this process.
Creating a Connection in Scriptcase
See below how to create a connection in your Scriptcase project, using the previously enabled Driver and the Oracle database.
1 - Access any project from your Scriptcase.
2 - Click on the New Connection icon to create a connection.
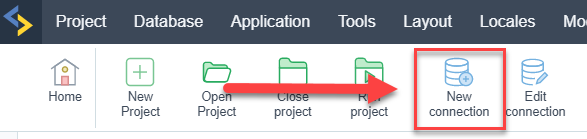
or access the Database > New Connection menu tab.
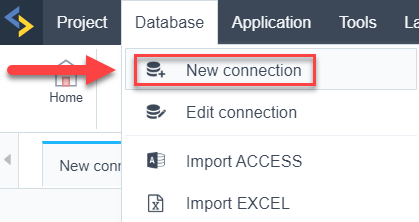
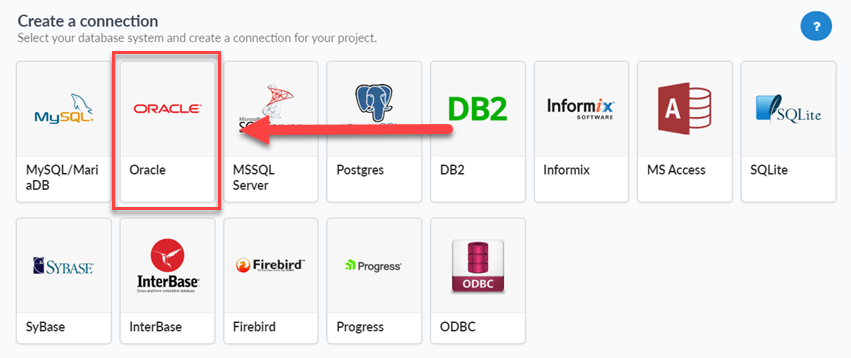
After that, a new page will appear with all database connections.
3 - Select the Oracle connection.
Connection
Enter the parameters for connecting to your Oracle database as follows:
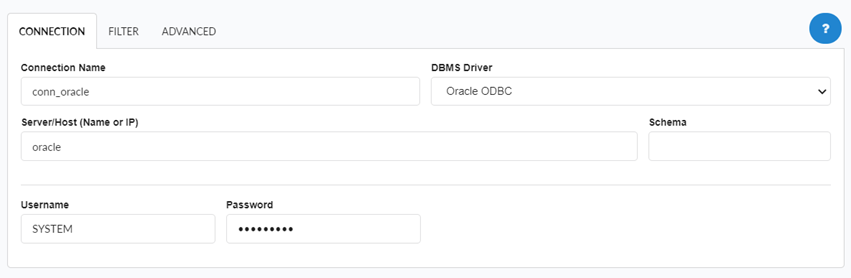
-
Connection Name: Define the name of your new connection. By default, Scriptcase adds the prefix conn along with the database name.
-
DBMS Driver: Select the Oracle Driver used to connect. In this example, we use the Oracle ODBC Driver.
- Server/Host (Name or IP): Enter the Data Source Name created in your ODBC manager.
- E.G.
oracle
- E.G.
- Schema: Inform the Scheme of specific tables created for the use of the informed user.
- This item is optional if you do not have a schema configured in your database.
- This item is optional if you do not have a schema configured in your database.
- Username: Inform the user to authenticate the connection to your Oracle database.
- For Oracle connections, the user must be capitalized, as in the example.
- For Oracle connections, the user must be capitalized, as in the example.
-
Password: Enter the password to complete the authentication process.
- Test Connection: Click on this button to get a response from the Scriptcase request to find out if the parameters entered are correct.

Filter
Accessing this tab, you can configure which Database items will be displayed on the connection, depending or not on the owner.
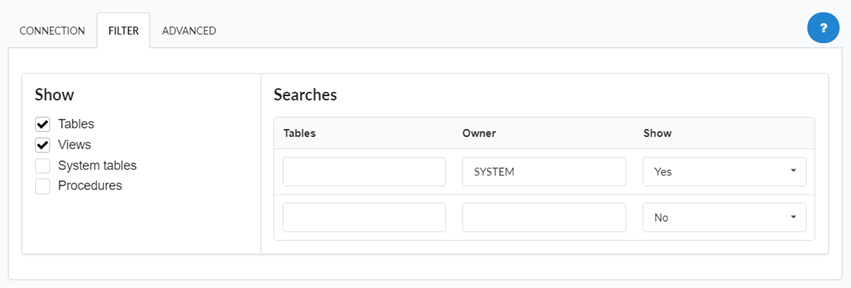
Show
It allows the Oracle connection to see tables, views, system tables and procedures depending on the items selected by the user. By default, the items Tables and Views are already selected by Scriptcase.
- Tables: By selecting this option, the tables in your database will be displayed.
- By default, Scriptcase enables this option.
- By default, Scriptcase enables this option.
- Views: By selecting this option, the views of your database will be displayed.
- By default, Scriptcase enables this option.
- By default, Scriptcase enables this option.
-
System Tables: By selecting this option, the system tables of your database will be displayed.
- Procedures: By selecting this option, the procedures of your database will be displayed.
Searches
Allows you to define which tables and owners are displayed.
- Tables: You can define in this option which tables will be displayed. The configuration can contain a
PREFIX%or name of the tables to display.- By default, Scriptcase leaves this option empty.
- E.g.
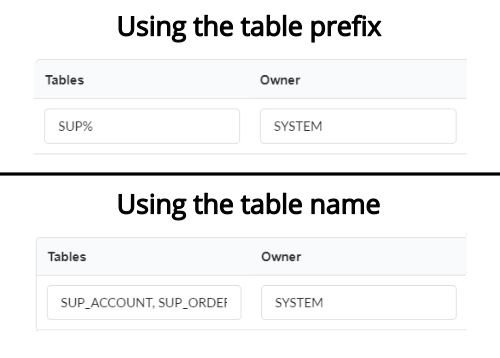
- Owner: Inform the user who sees the tables entered for display.
- The user must be in capital letters as in the example above.
- The user must be in capital letters as in the example above.
- Show: Choose whether tables for the informed owner are displayed.
NOTE: By using table filtering, you eliminate unnecessary tables for your project and improves the performance of your Oracle database connection.
Advanced
In this tab, you have access to specific settings for the connection. The changes made in this session impact the data display and application performance.
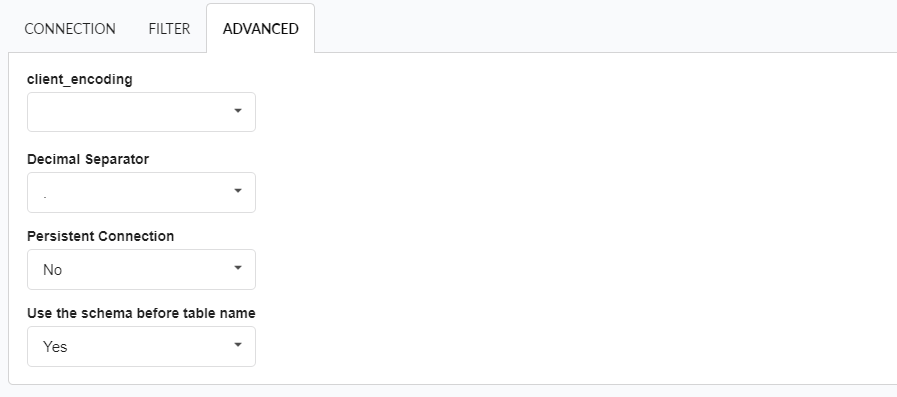
- client_encoding: Select the encoding used in your database. In the example above, we use the client_encoding UTF-8.
- By default, this option is left blank by Scriptcase.
- By default, this option is left blank by Scriptcase.
- Decimal Separator: Select the type of separator for decimal records, between comma and period.
- By default, the period
.is selected as a separator.
- By default, the period
- Persistent Connection: Define whether the connections will be closed after the execution of your scripts in Scriptcase applications.
- By default, Scriptcase disables this option.
- By default, Scriptcase disables this option.
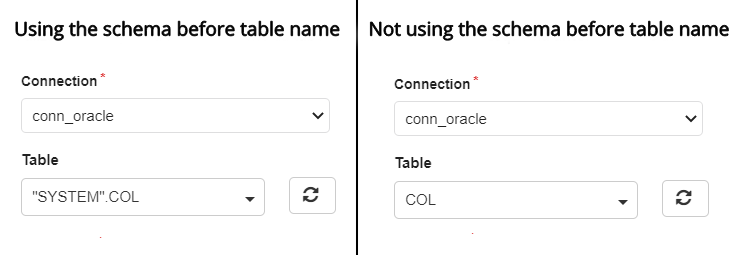
- Use the schema before table name: Define whether the database schema is displayed before the table names.
-
By default, Scriptcase enables this option.
-
E.g.
-