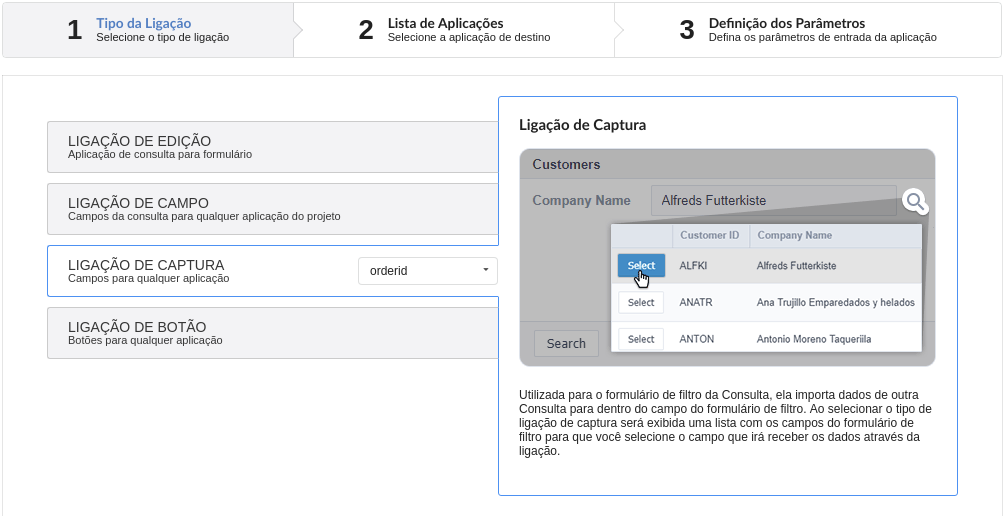
Capture Link
Creating a Capture Link
The capture link is used to return a value from a Grid to a Form field.
In the types of links options, we will choose the Capture Link. After selection this option, we should also choose which field we want to return the value of.
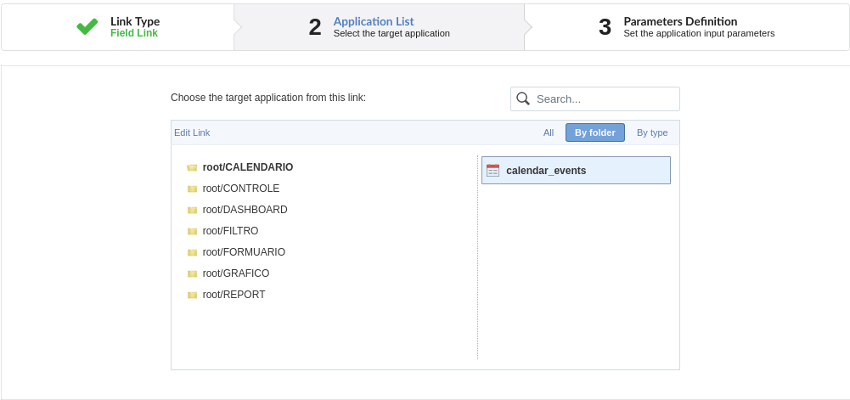
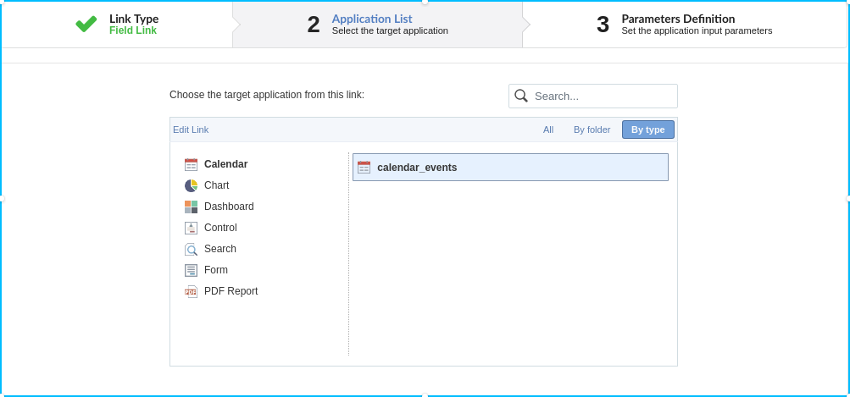
Applications list
After we select this option, will be displayed the applications list to what you want to create the link.
This screen can be viewed from the following ways:
All:
In which is possible to see all the project’s applications. Example:

By folder:
In which is possible to see the applications according to the folders in which each of them are.
By type:
In which is possible to see the applications grouped by its respective types.
Definition of Parameters
In this setting we are going to define the type of parameter that will be passed to the next application.
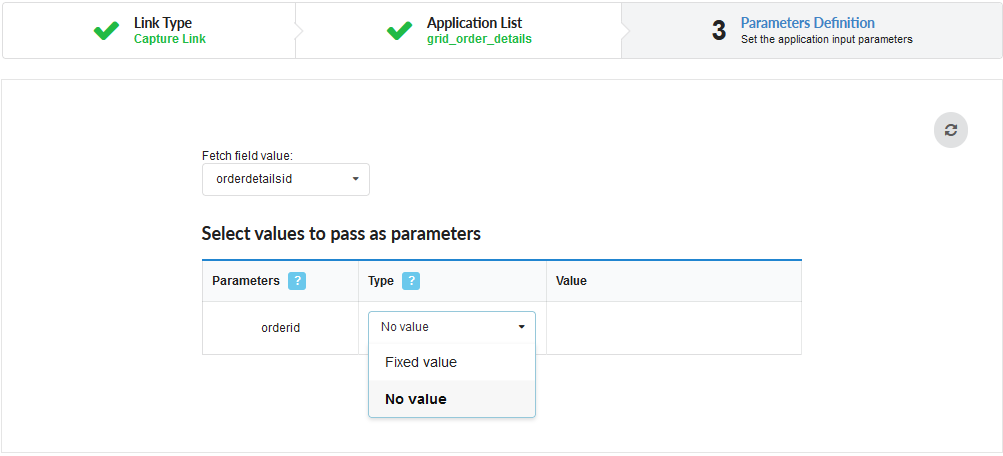
We have two options at Type of Parameters, they are:
Fixed value:
This option allows the user to define a fixed value that will be used to the call of the next application.
No value:
This option allows to create the link without the need to send any parameter to the next application.
It is also possible to see a refresh button at its right side.
This button should be used when a new parameter is added to the target application, so the new parameter can be loaded in the current application to make the link.
Application with no parameters
However, when the target application does not have any defined parameters, the following screen is displayed:
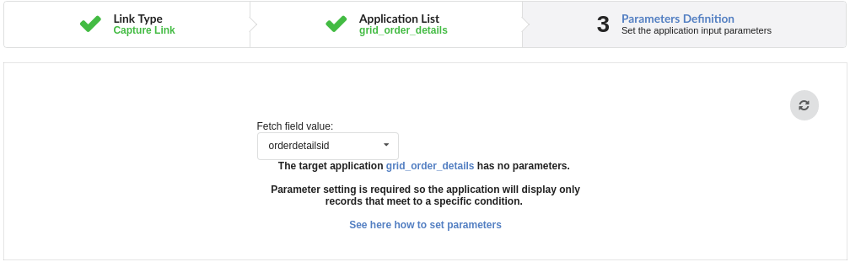
Clicking in the button, you will be taken to the target application to create a parameter, so you can use the update button in the parameters definitions to refresh them.
Link properties
In this screen we will set the application display mode that will be called in the link.
In this type of link there is only one display option:
Modal:
When we use this option the target application will be displayed in the same window of our application, however it will be displayed in a small window above the current application.
Modal
When we use this option the target application will be displayed in the same window of the application, however she will be displayed in a small window above the current application.
When we select this option, we can set the following options:
Modal:
In this option we are going to define if the target application will be opened in a Modal.
Yes: This option will make the target application be opened in a modal. No: This option will make the target application be opened in a new window.
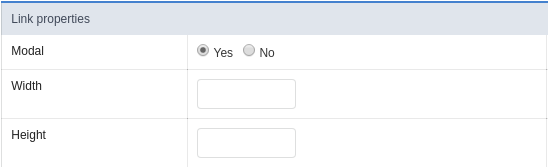
If Yes is selected in the previous option, the Modal Height and Width will be available.
![Modal with yes][modal2]
Height:
Allows to set the Modal height.
Width:
Allows to set the Modal width.
If No is selected in the previous option, only those options will be available.
Allows to modify manually in the update:
When we select the option Yes, the button New is created in the grid to insert new registers.
Allows to modify manually in the insert:
Indicates which shortcut key to the button add new register.
Allows to modify automatically in the update:
Exit URL to the called form. If any value is defined, the return address (back button) will be the exit URL of the called form.
Allows to modify automatically in the insert:
Choosing the option Yes, the window will be closed after doing the insert of a register.