Connection to MSSQL Server ODBC
At Scriptcase, we have the following drivers available for connecting to SQL Server on Windows: MSSQL Server NATIVE SRV, MSSQL Server NATIVE SRV PDO and MSSQL Server ODBC .. If you are using your own PHP, as a pre-configured MSSQL environment, it can be manually configured in PHP.
Requirements
Before proceeding with this documentation, check your PHP architecture. For drivers to be enabled correctly, files must be downloaded according to the architecture used.
- In your Scriptcase, there is the file info.php, access it by the URL:
http://127.0.0.1:8092/scriptcase/info.php, where you will find the information regarding the architecture in phpinfo().
NOTE: If you are using Scriptcase’s automatic installer, the PHP architecture will be the same as the one you downloaded. Download Microsoft ODBC Driver 13 For SQL Server according to your PHP architecture .
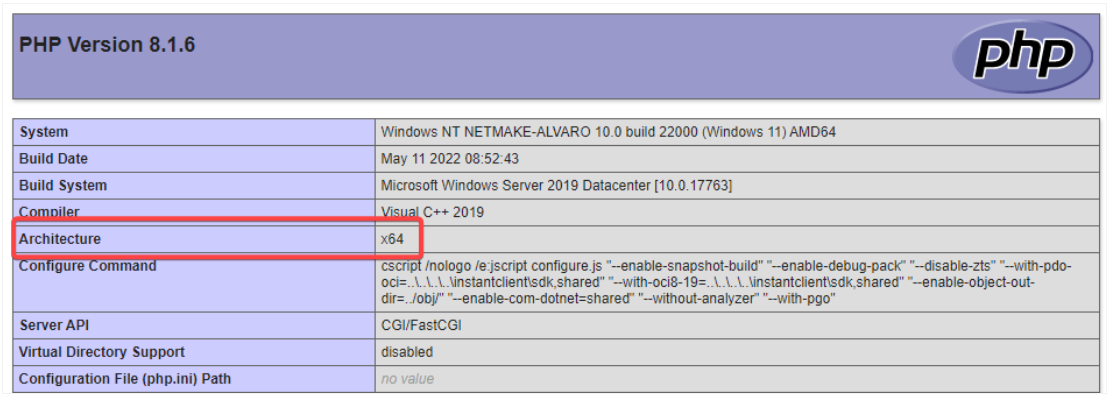
- x86 Architecture = 32 bits
- x64 Architecture = 64 bits
File list
Listed below are the necessary files for the drivers to be enabled.
- Download Microsoft ODBC Driver 13 For SQL Server x64
- Download Microsoft ODBC Driver 13 For SQL Server x86
- SQL Server extensions for PHP
Compatibility Table
| Server 2016 | Server 2012 /R2 | Windows 10 | Windows 8 / 8.1 | Server 2008 SP2 / R2 SP1 | Windows 7 SP1 | Windows Vista SP2 | |
|---|---|---|---|---|---|---|---|
| Native SRV PDO |  |
|
|
|
|
|
 |
| Native SRV | |
|
|
|
|
|
|
| ODBC | |
|
|
|
|
|
|
IMPORTANT: if you need to use Database Identifiers in your tables, we recommend using the double quotation marks( “ ) instead of the brackets( [ ] ) because of the conflict with the of Global Variables syntax Scriptcase. Using the brackets as database identifiers may lead to problems in the Scriptcase applications.
Configuring and enabling MSSQL Server SRV PDO on Windows
If you are using Scriptcase’s automatic installer, the extensions are already enabled in PHP, requiring only the installation of the client. Proceed to item 3
1 - Extract the .zip file and copy the files from the php_pdo_sqlsrv_81_nts_x64 and php_sqlsrv_81_nts_x64 .dll extensions previously downloaded to your PHP’s ext folder.
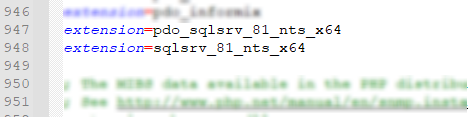
2 - In the php.ini file, located in C:\php, add the lines referring to the MSSQL Server extensions php_pdo_sqlsrv_81_nts_x64 and php_sqlsrv_81_nts_x64. See the example below:
extension=pdo_sqlsrv_81_nts_x64
extension=sqlsrv_81_nts_x64
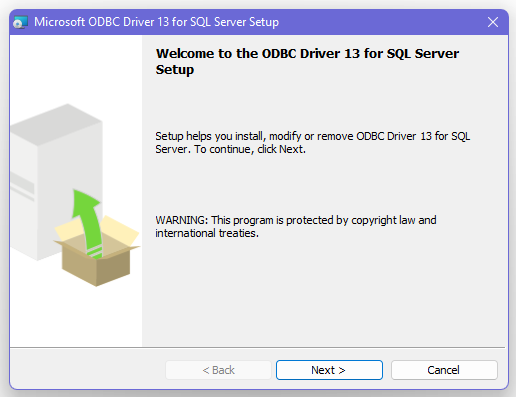
3 - After downloading the Microsoft ODBC Driver 13 For SQL Server file, run the installer and follow the steps below:
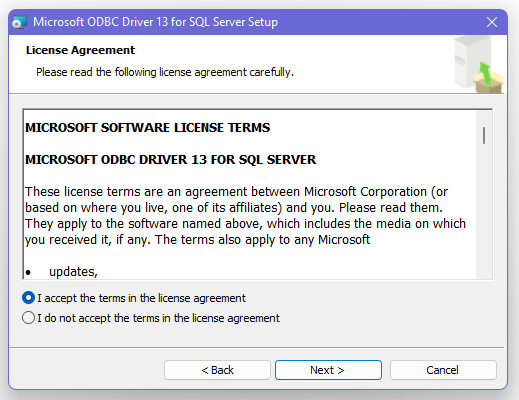
4 - Accept the terms of the license agreement and click Next.
5 - Check the option “ODBC Driver for SQL Server SDK”, because the components that we will need are also in this option.
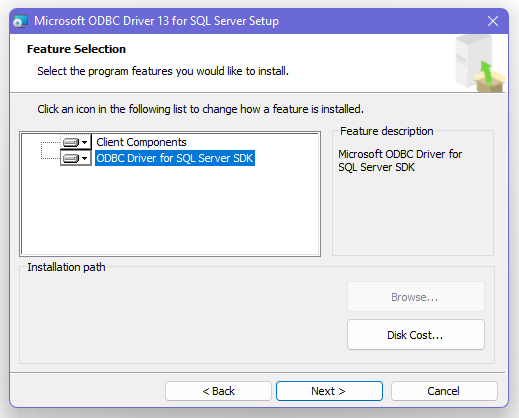
- In this option, leave the option “Client Components” checked.
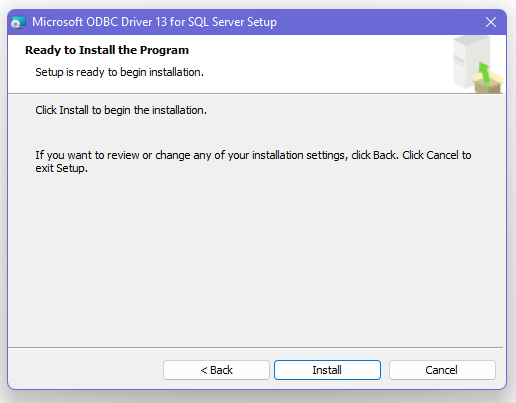
6 - Click Install to start the client installation.
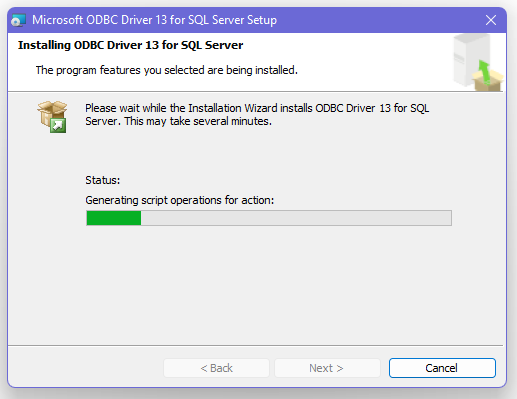
7 - The program features you selected are being installed.
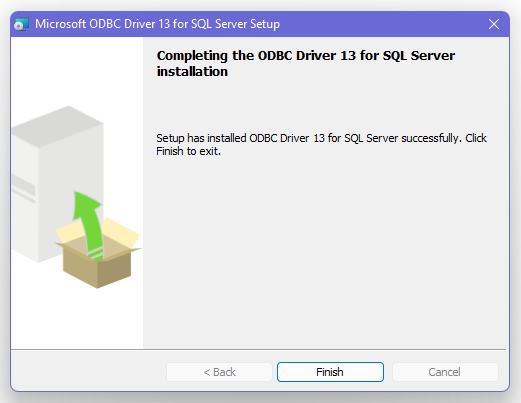
8 - Click finish to exit.
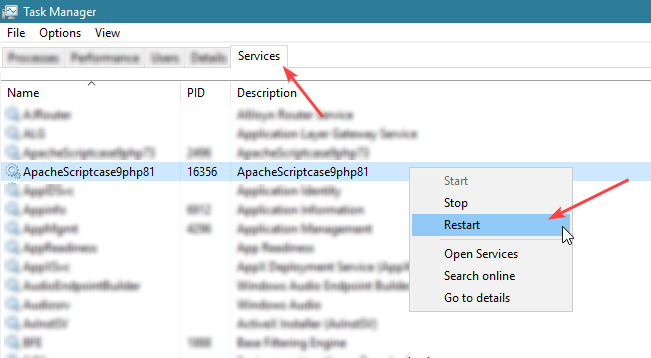
9 - Restart Apache service through Task Manager.
-
Open the Task Manager and click on the Services tab.
-
Look for the
ApacheScriptcase9php81orApache2.4service and right click on that service, then click Reiniciar.
Creating the DSN for connection
To connect to the MSSQL Server ODBC Driver, you need to configure a System DSN. Follow the steps described below to perform this configuration.
ATTENTION: ODBC must be created on the same Server where ScriptCase is installed.
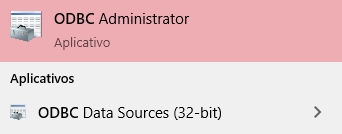
1 - Access your ODBC Data Source Manager and select according to your architecture. We will select the x64 version:
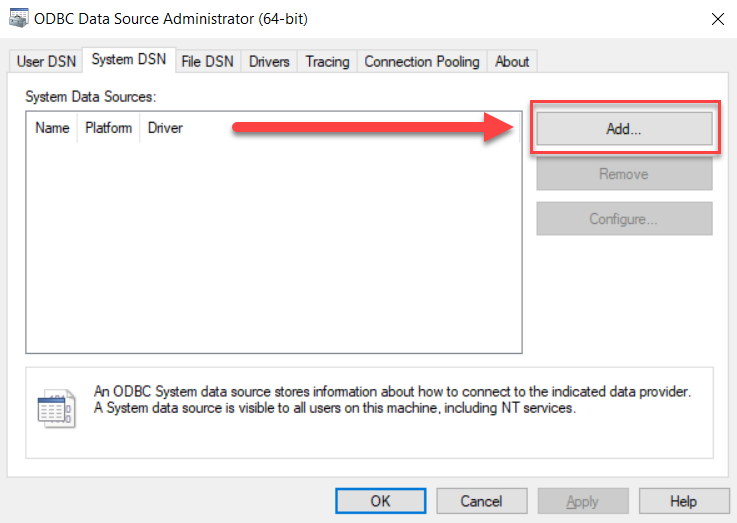
2 - When entering the ODBC Data Sources Administrator, select the DSN System tab and click on _Add to create your connection to your Database.
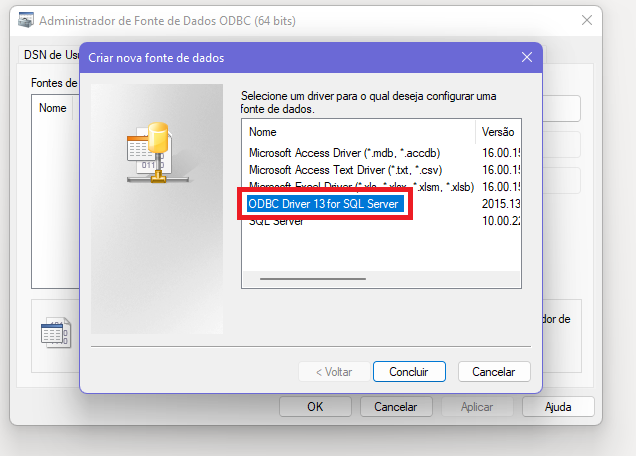
3 - After that, it is necessary to select the Driver to connect to the MSSQL Server. Select the Driver: ODBC Driver 11 for SQL Server .
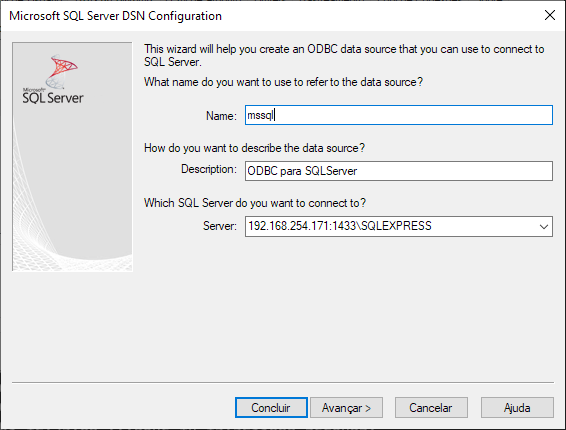
4 - Now, you need to define the name of the DSN, the description and the database connection server.
-
Name: Enter the name that the DSN will have so that you can use it in Scriptcase.
-
Description: Add a description for the DSN.
-
Server: inform the database server, port and instance that you will connect to.
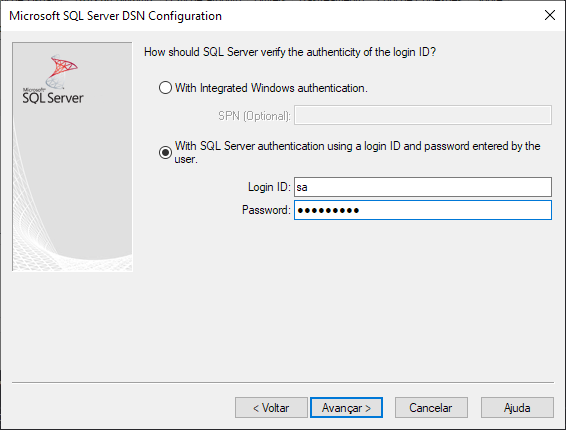
4.1 - After entering the data, click on the Next button to enter the user name and password required for connection.
-
Login ID: Inform the user to authenticate with the database.
-
Password: Enter the corresponding password to authenticate with the informed user.
4.2 - Now, click Next to select the default database.
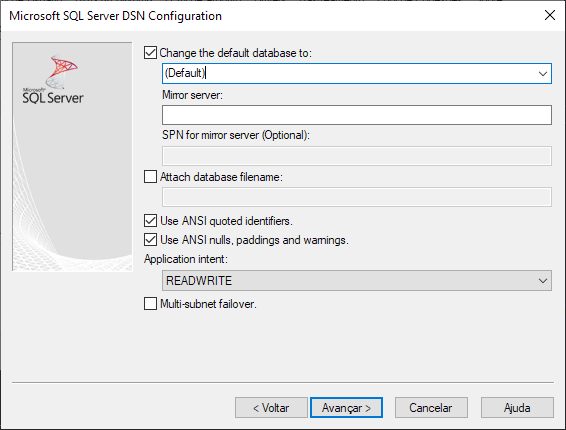
To finish, click Next and finally, click Finish.
Creating a Connection in Scriptcase
See below how to create a connection in your Scriptcase project, using the enabled Driver and the Microsoft SQL Server database.
1 - Access a project from your Scriptcase.
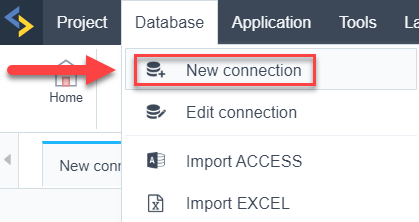
2 - Click the New Connection icon to create a connection
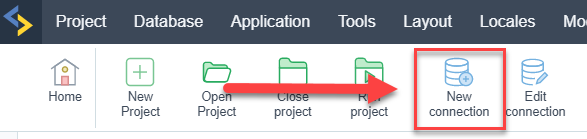
or access the menu Database > New connection.
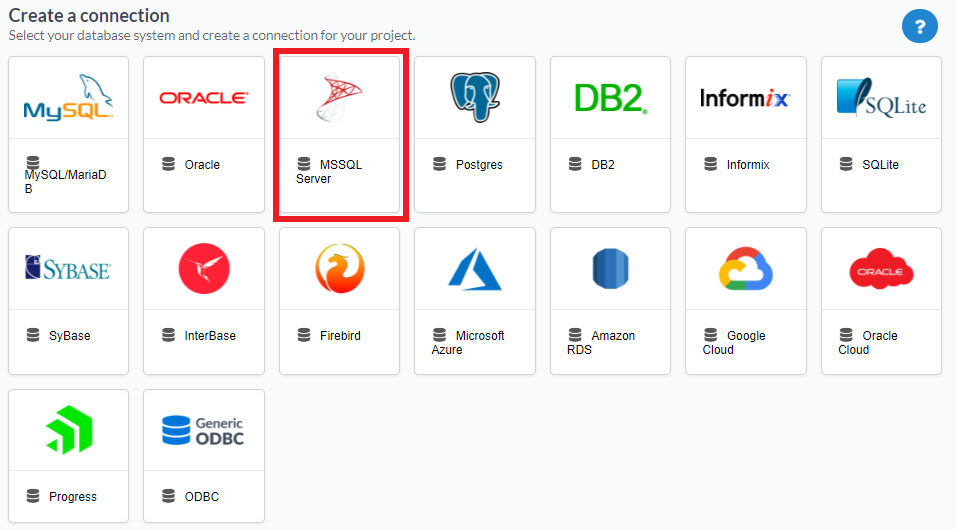
After that, a screen will appear with all database connections.
3 - Select the MSSQL Server connection.
Connection
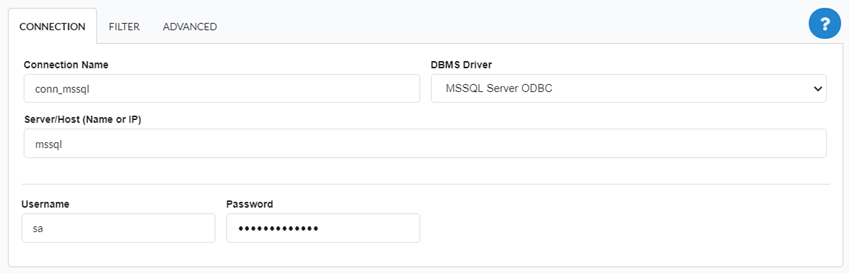
Enter the parameters for connecting to your MSSQL Server database as follows:
-
Connection name: Define the name of your new connection. By default, Scriptcase adds the prefix conn along with the database name.
-
DBMS Driver: Select the DB2 Driver to connect. In this example, we use the MSSQL Server ODBC Driver.
- Server/Host (Name or IP): Enter the system DSN that was configured in ODBC Manager.
-
EX:
mssql -
Username: Inform the user to authenticate the connection to your database.
-
Password: Enter the password to complete the authentication process.
- Test connection: Click this button to get a response to the Scriptcase request to find out if the parameters entered are correct.

Security
Security tab, where the connection encryption settings are defined.

Encrypt
This property specifies whether communication with the SQL server should be encrypted. To enable encryption, you must set this property to “true”. This ensures that data sent between the client and server is protected by encryption.
trustservercertificate
Set to “true” to specify that the driver does not validate the server’s TLS/SSL certificate.
If “true”, the server’s TLS/SSL certificate is automatically trusted when the communication layer is encrypted using TLS.
trustStore
The path (including the file name) to the certificate’s trustStore file. The trustStore file contains the list of certificates that the client trusts.
When this property is not specified or is set to null, the driver relies on the trust manager factory query rules to determine which certificate store to use.
trustStorePassword
The password used to verify the integrity of trustStore data.
If the trustStore property is set but the trustStorePassword property is not set, the integrity of the trustStore is not checked.
hostnameInCertificate
The hostname to use to validate the SQL Server TLS/SSL certificate.
This property allows you to specify the expected hostname in the SQL server certificate. This is useful to ensure that the connection is only made to the correct server and not to a malicious server that may be using an invalid certificate.
Note: This property is used in combination with the encrypt/authentication properties and the trustServerCertificate property. This property affects certificate validation if the connection uses TLS encryption and trustServerCertificate is set to “false”. Ensure that the value passed to hostNameInCertificate matches the Common Name (CN) or DNS name in the Subject Alternative Name (SAN) in the server certificate for a TLS connection to be successful. For more information about encryption support, see Understanding encryption support.
Filter
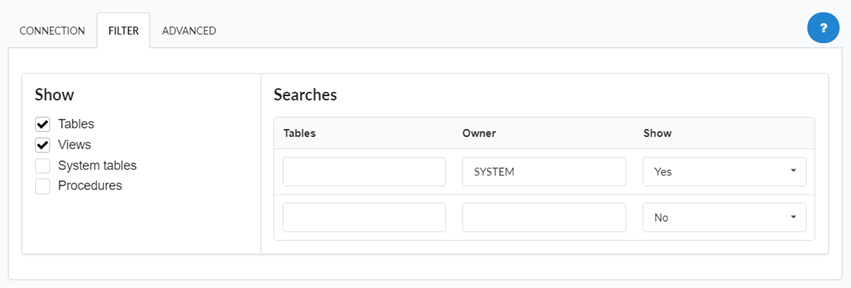
Accessing this tab, you can configure which Database items will be displayed on the connection, depending on the owner or not.
Show
It allows the connection to see tables, views, system tables and procedures depending on the items selected by the user. By default, the items Tables and Views are already selected by Scriptcase.
- Tables: Selecting this option, the tables in your database will be displayed.
- By default, Scriptcase enables this option .
- By default, Scriptcase enables this option .
- Views: By selecting this option, the views of your database will be displayed.
- By default, Scriptcase enables this option .
- By default, Scriptcase enables this option .
-
System Tables: Selecting this option, the system tables of your database will be displayed.
- Procedures: By selecting this option, the procedures of your database will be displayed.
Searches
Allows you to define which tables and owners are displayed.
- Tables: You can define in this option which tables will be displayed. The configuration can contain a
PREFIX%%or name of the tables to display.- By default, Scriptcase leaves this option empty .
- EX:
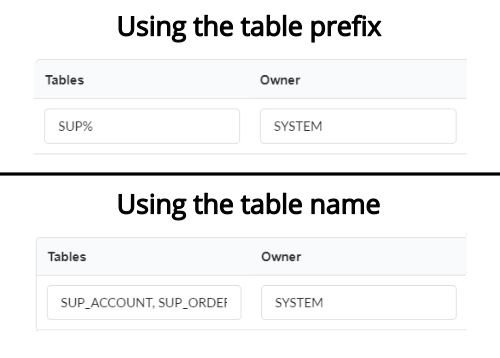
- Owner: Inform the user who sees the tables informed for display.
- User must be capitalized as in the example above .
- User must be capitalized as in the example above .
- View: Choose whether tables for the informed owner are displayed.
NOTE: By using table filtering, you eliminate unnecessary tables for your project and improves the performance of your database connection.
Advanced
In this tab, you have access to specific settings for the connection. The settings made in this session impact the data display and application performance.
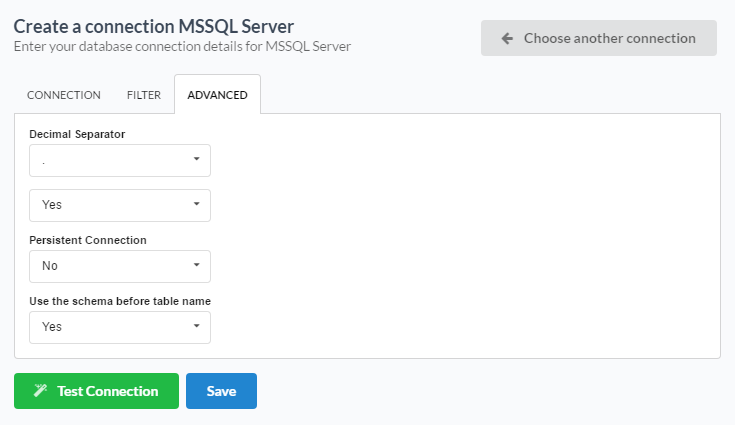
- Decimal Separator: Select the type of separator for decimal records, between comma and period.
- By default, the
.dot is selected as a separator .
- By default, the
- Persistent Connection: Define whether connections will be terminated after the execution of your scripts in Scriptcase applications.
- By default, Scriptcase disables this option .
- By default, Scriptcase disables this option .
- Use the schema before the table name: Define whether the database schema will be displayed before the table names.
- By default, Scriptcase enables this option .